The Best Dark Chocolate Brownies
This post may contain affiliate links.
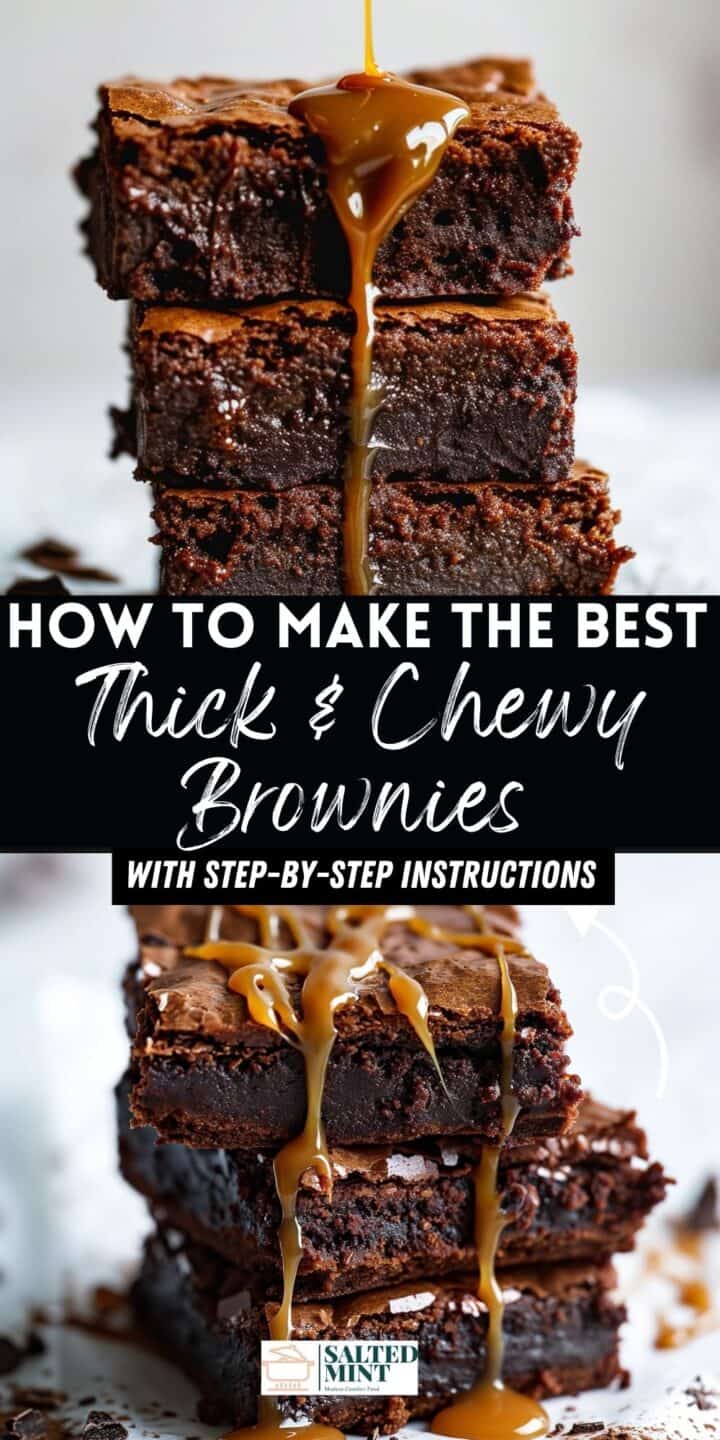
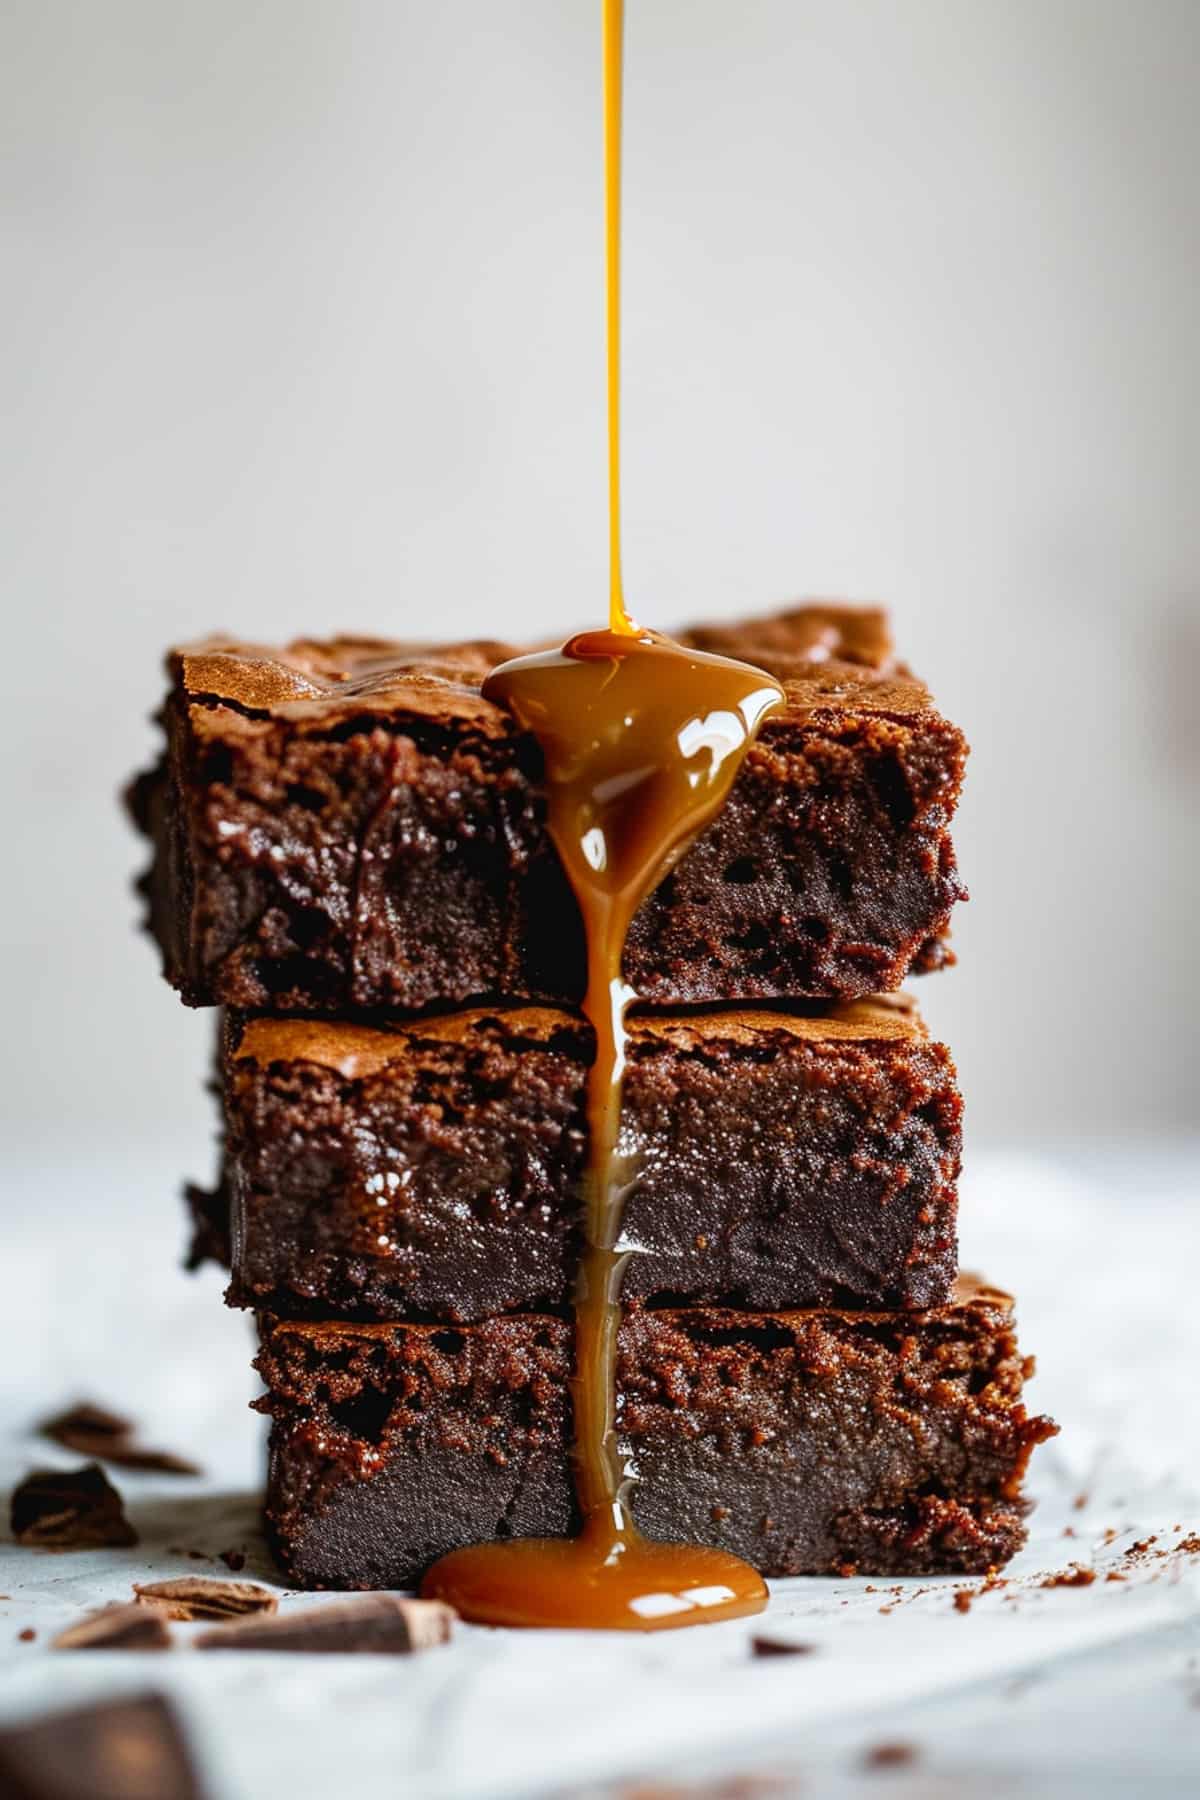
These dark chocolate brownies, made from scratch, are rich, thick, chewy, and fudgy. They require only 6 basic ingredients and are easy enough for even the most novice baker to turn out the perfect rich brownie every time.
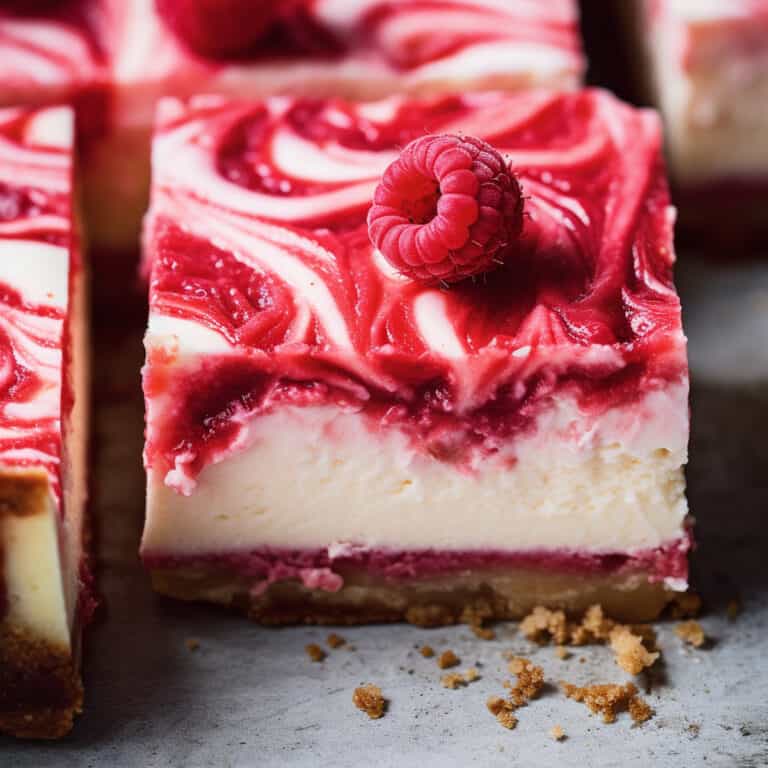
Having spent years as a pastry chef in Michelin-starred restaurants, I’ve been testing and perfecting lots of chocolate recipes. You can try this dark chocolate no-bake tart or this hazelnut chocolate tart. And for white chocolate lovers, these white chocolate raspberry cheesecake bars are perfect!
⭐️ Why this recipe works:
- High-Quality Ingredients: The use of high-quality dark chocolate ensures a rich, deep chocolate flavor that is the star of the recipe. The combination of dark chocolate and cocoa powder adds layers of intensity.
- Perfect Texture Balance: Whisking the eggs and sugar until fluffy and pale incorporates air into the batter, helping create a light and airy texture. This, combined with the dense richness of melted chocolate and butter, creates a perfect balance between fudgy and chewy.
- Simple Yet Effective Method: The recipe employs a straightforward mixing method, melting the chocolate and butter together, which not only simplifies the process but also ensures that the brownies have a smooth, uniform texture.
🧾 Basic brownie ingredients
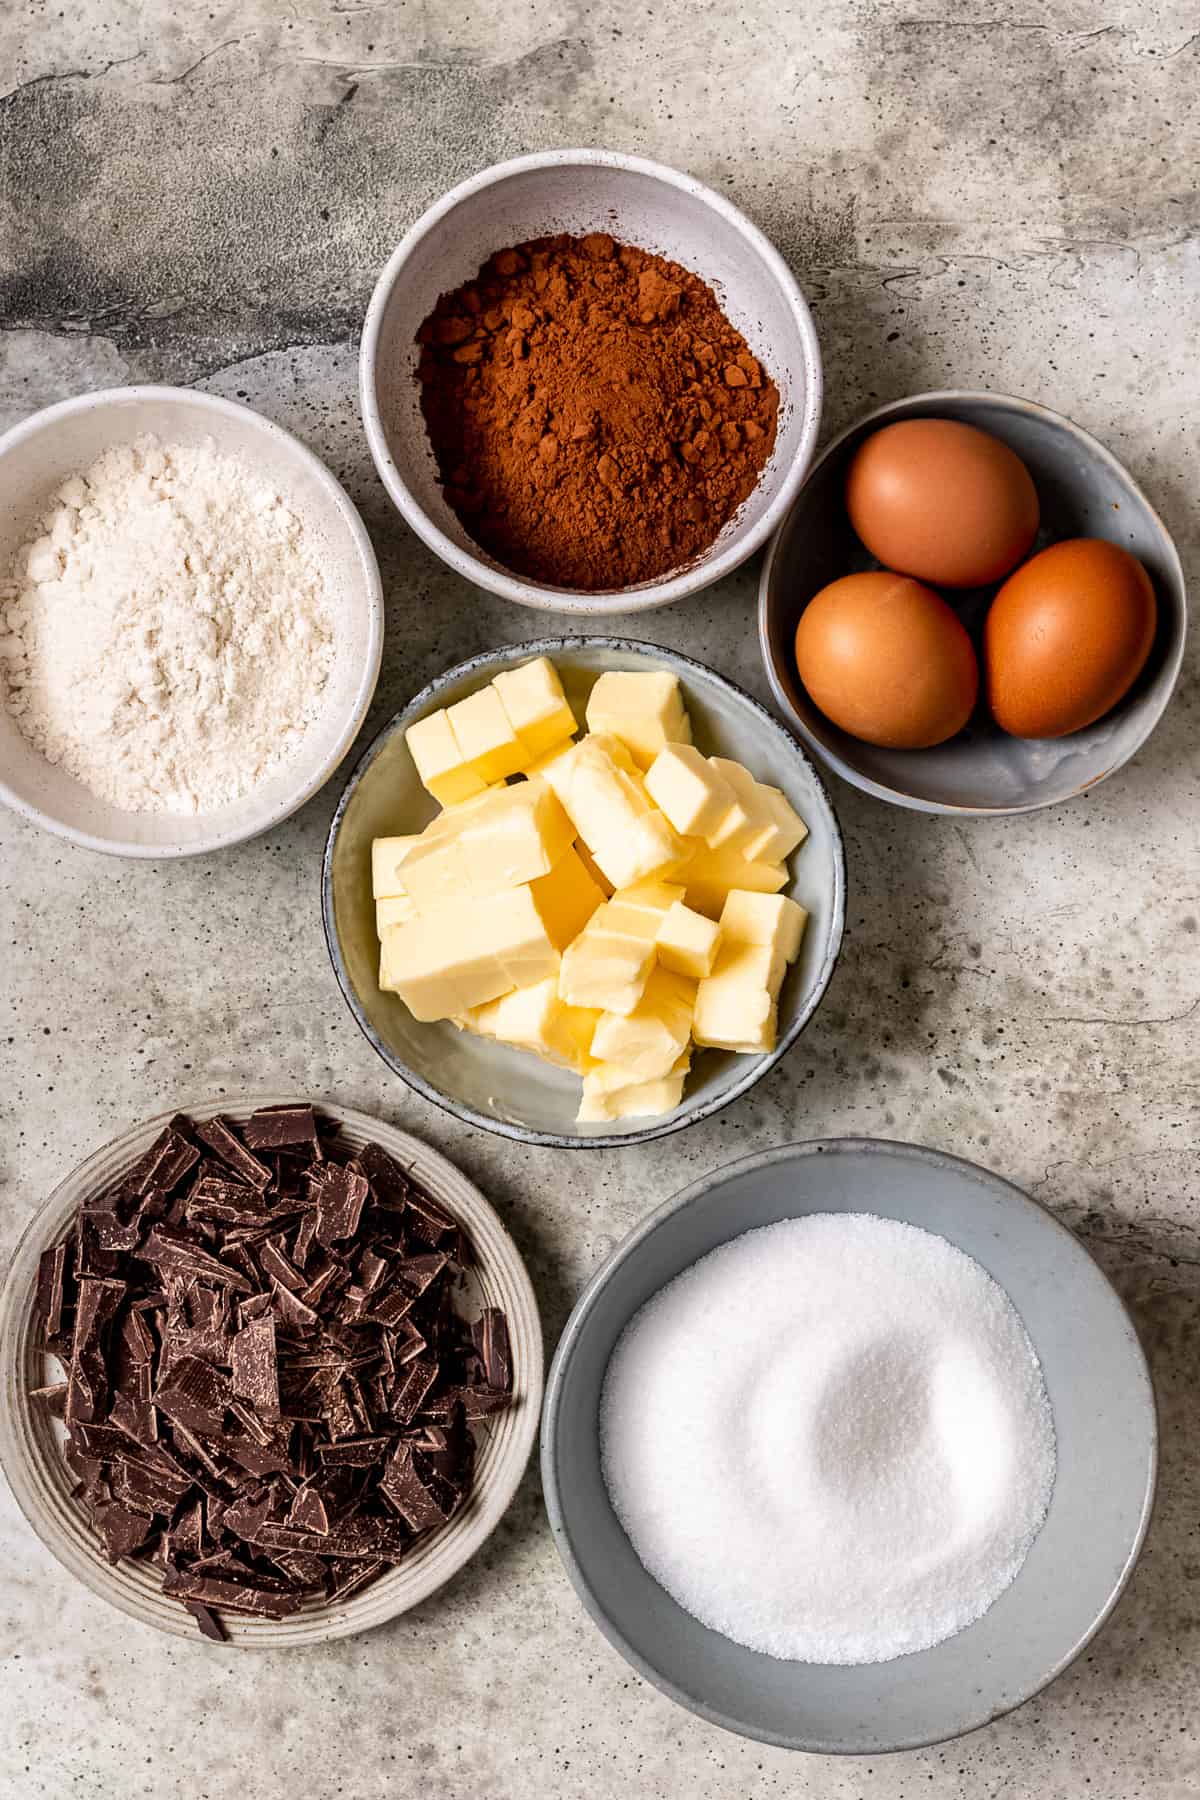
- Dark Chocolate: Use dark chocolate with at least 60% cocoa solids. This ensures a rich, deep chocolate flavor that isn’t overly sweet. Higher cocoa content also means the chocolate has less sugar, which helps achieve the perfect balance of sweetness and bitterness.
- Butter: Both salted and unsalted butter work well in this recipe.
- Cocoa Powder: Use Dutch-processed cocoa powder. It’s less acidic, resulting in a smoother, more mellow flavor and a deeper, darker color.
- Eggs: Room-temperature eggs whip better, incorporating more air into the batter. This is essential for achieving the light and fluffy texture that balances these brownies’ dense, fudgy quality.
- Granulated sugar: Sweetens the brownies and helps create a shiny, crackly top.
- All-purpose flour: Gives structure to the brownies.
For precise measurements and additional ingredients, refer to the recipe card at the bottom of the page.
👩🏻🍳 Here’s how to make
dark chocolate brownies step-by-step
- Preheat and Prepare Pan: Preheat the oven to 325ºF or 160ºC (for fan oven 320ºF & 150ºC). Line a 9 x 9 square pan with baking parchment or greaseproof paper.
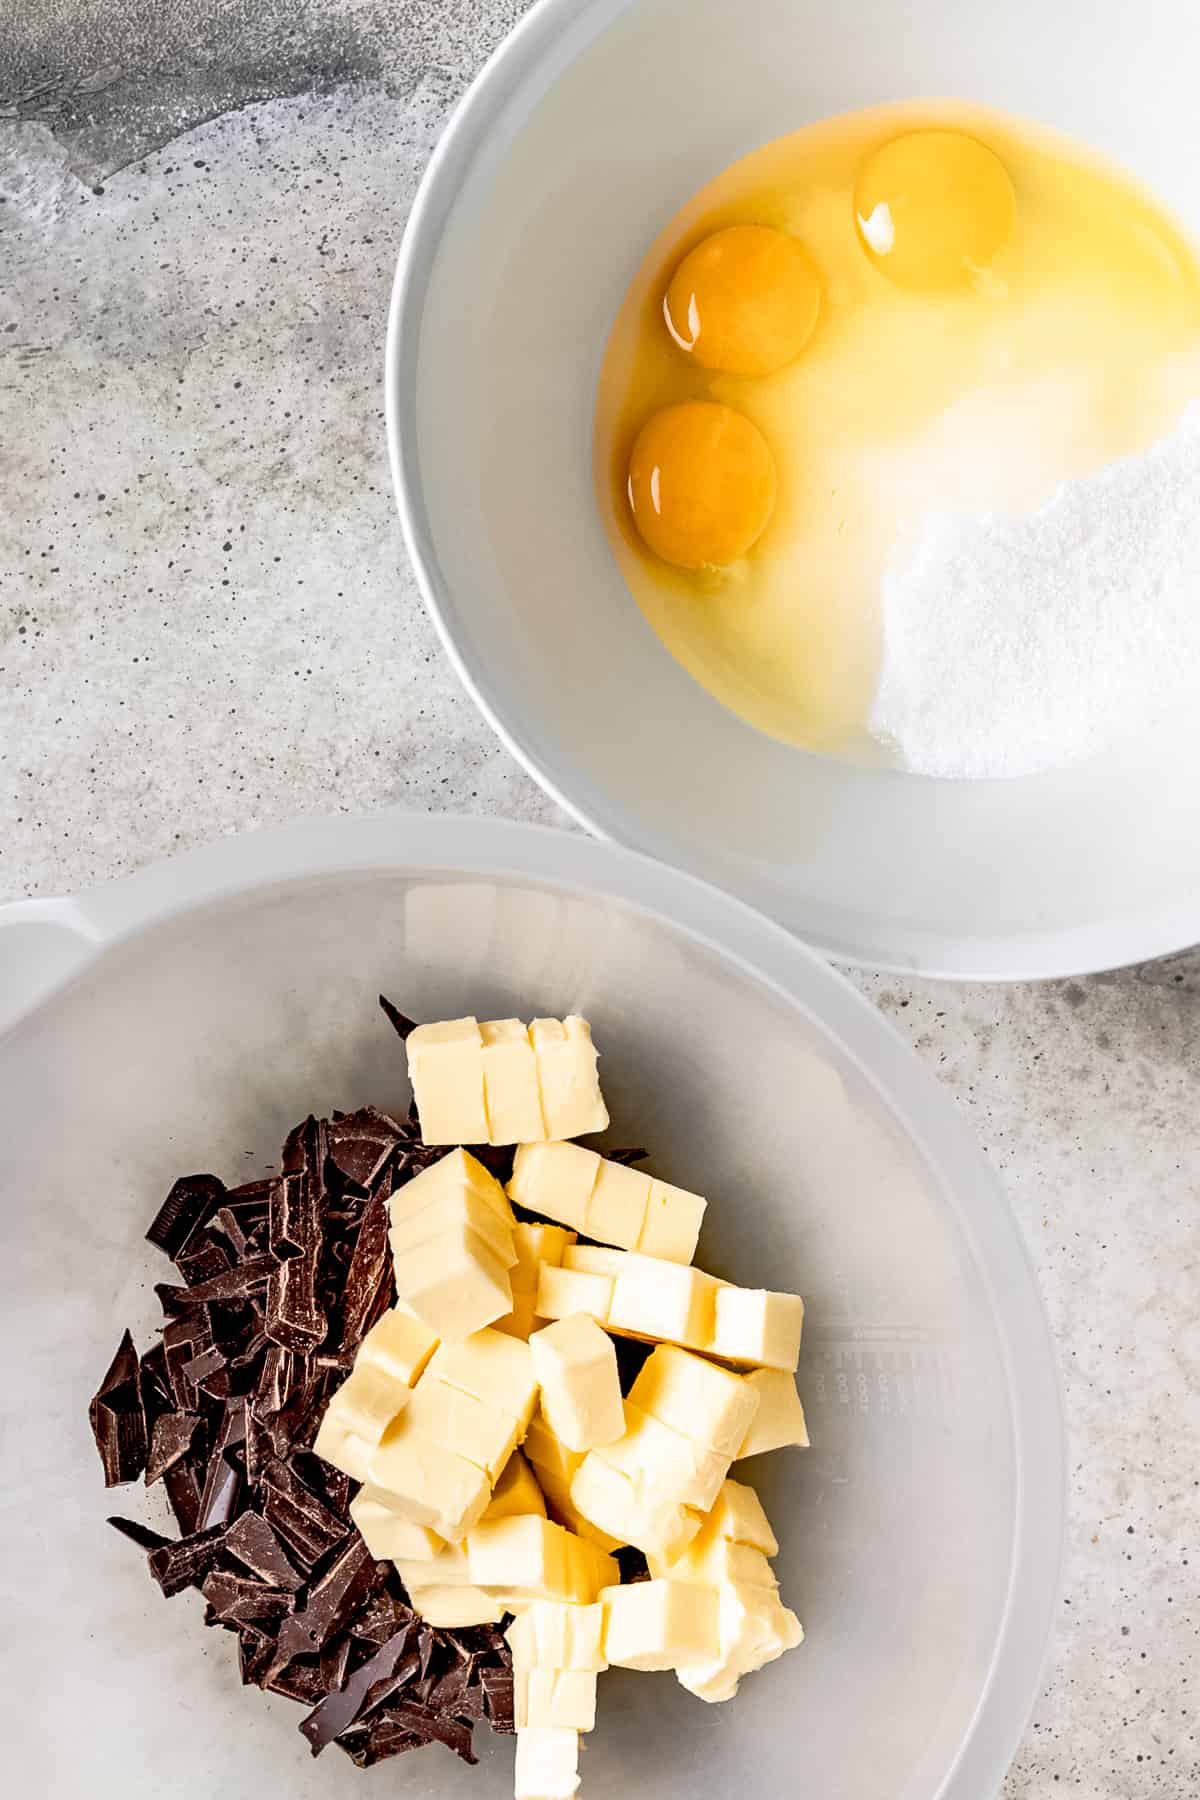
- Melt Butter and Chocolate: Combine the butter and chocolate in a bowl set over simmering water or in the microwave on medium, stirring every 30 seconds.
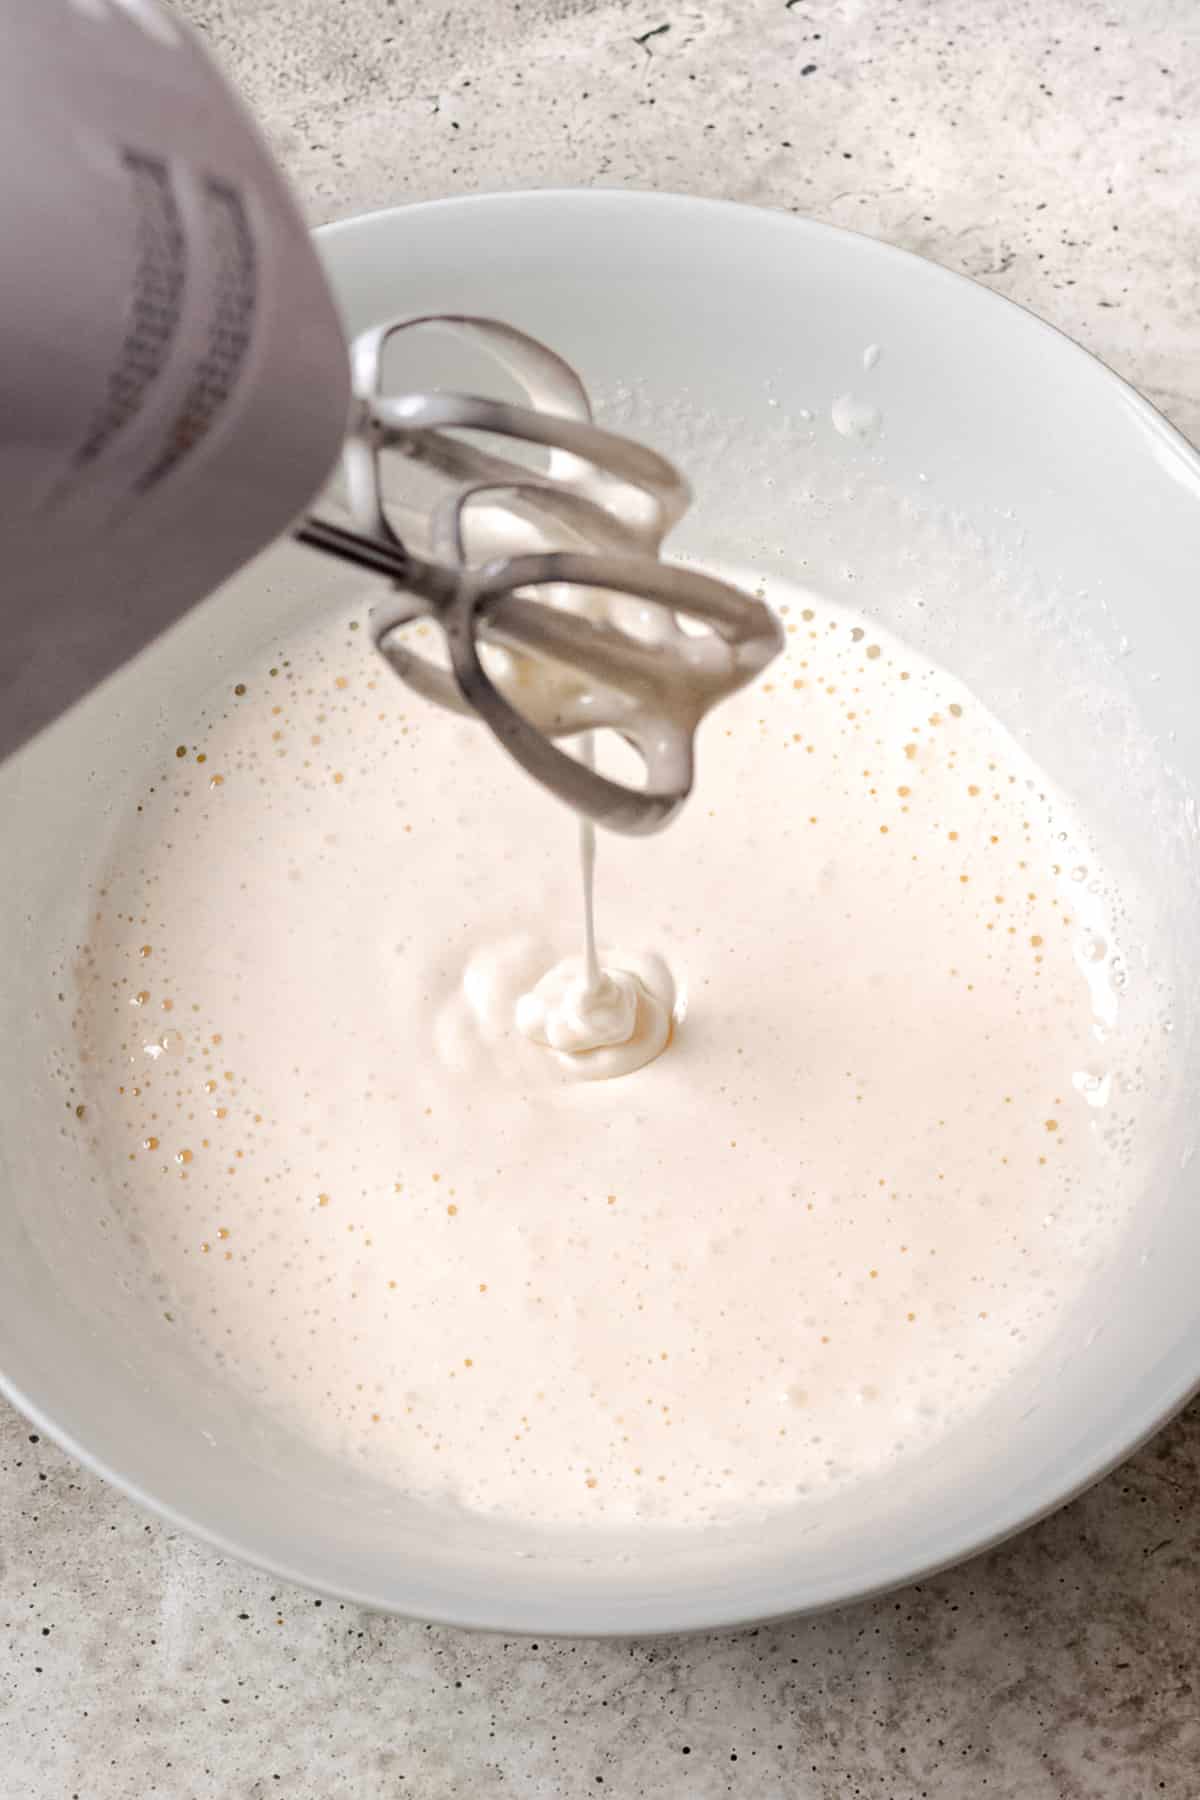
- Whisk Eggs and Sugar: In a separate bowl, whisk the eggs and sugar on high until fluffy and pale using an electric mixer or hand whisk.
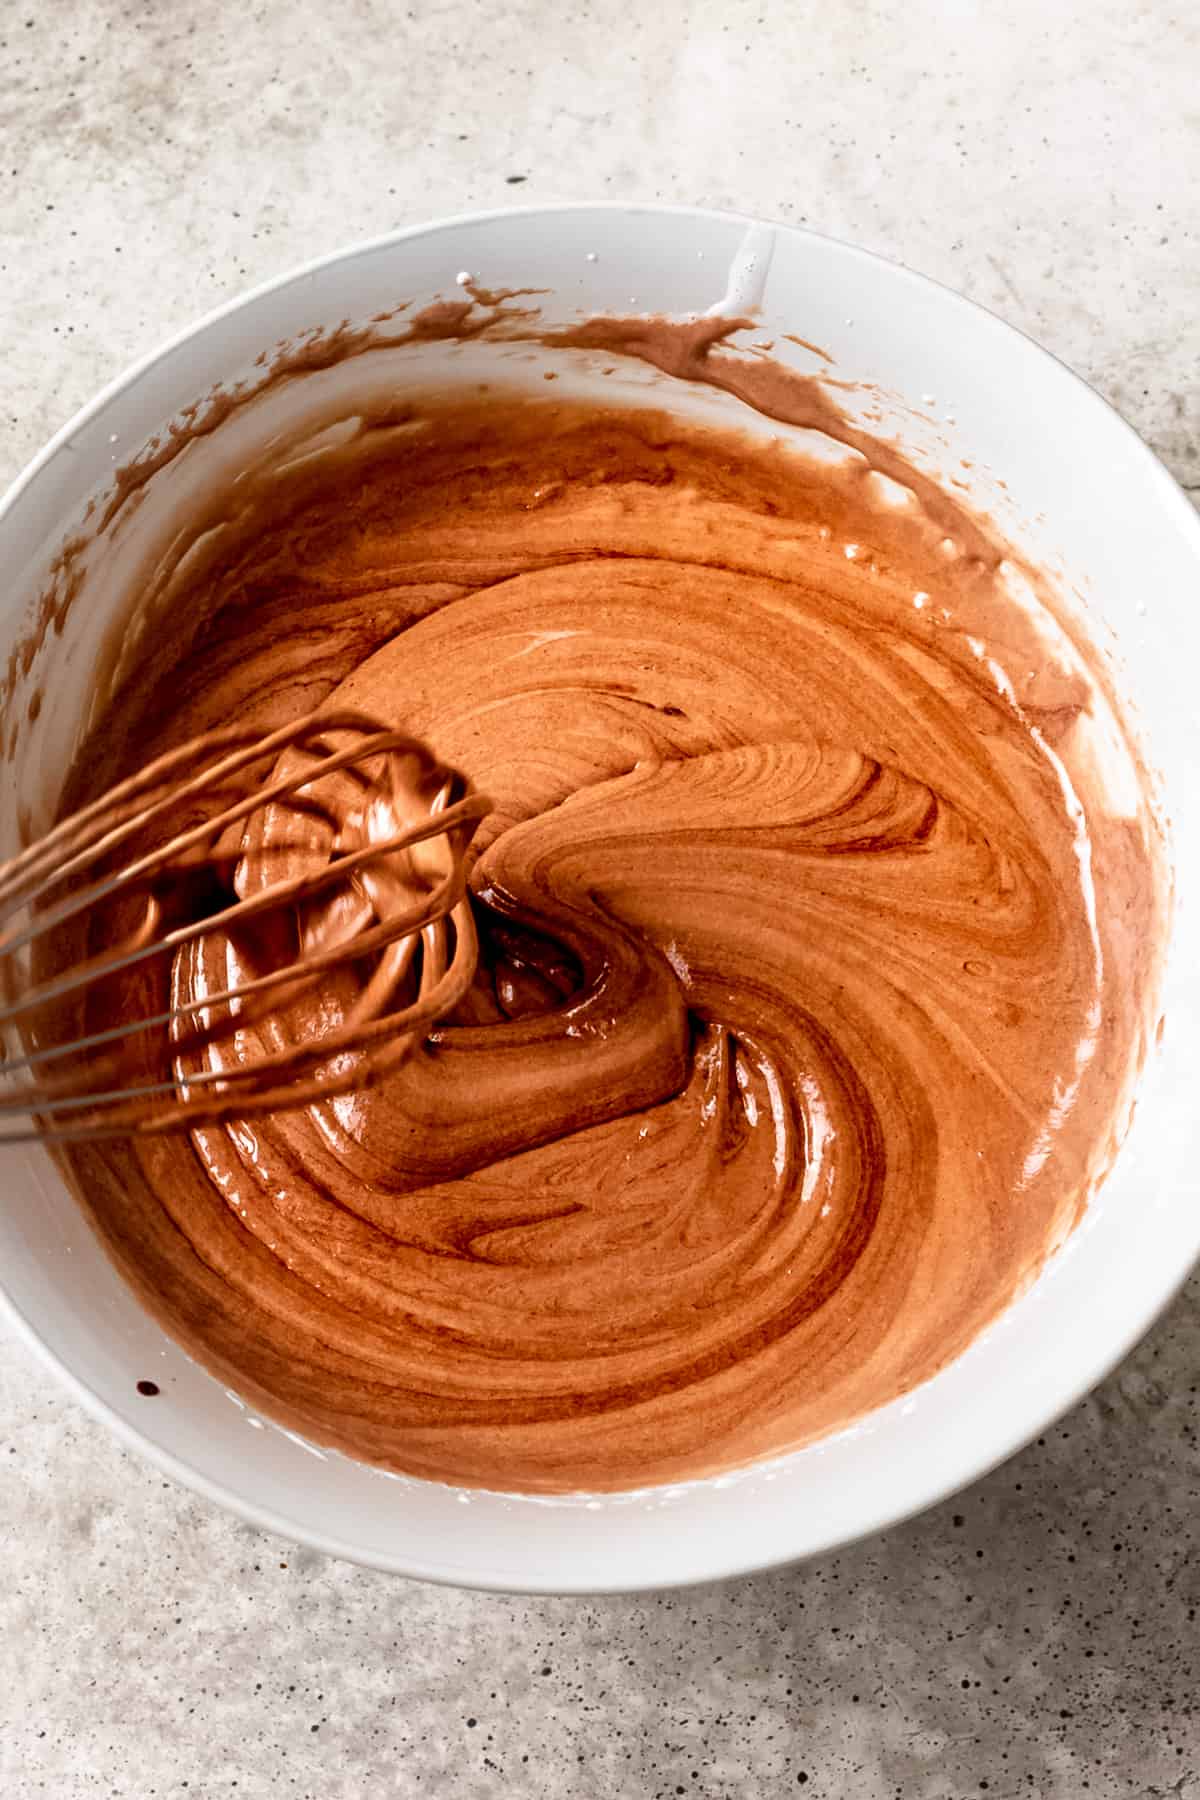
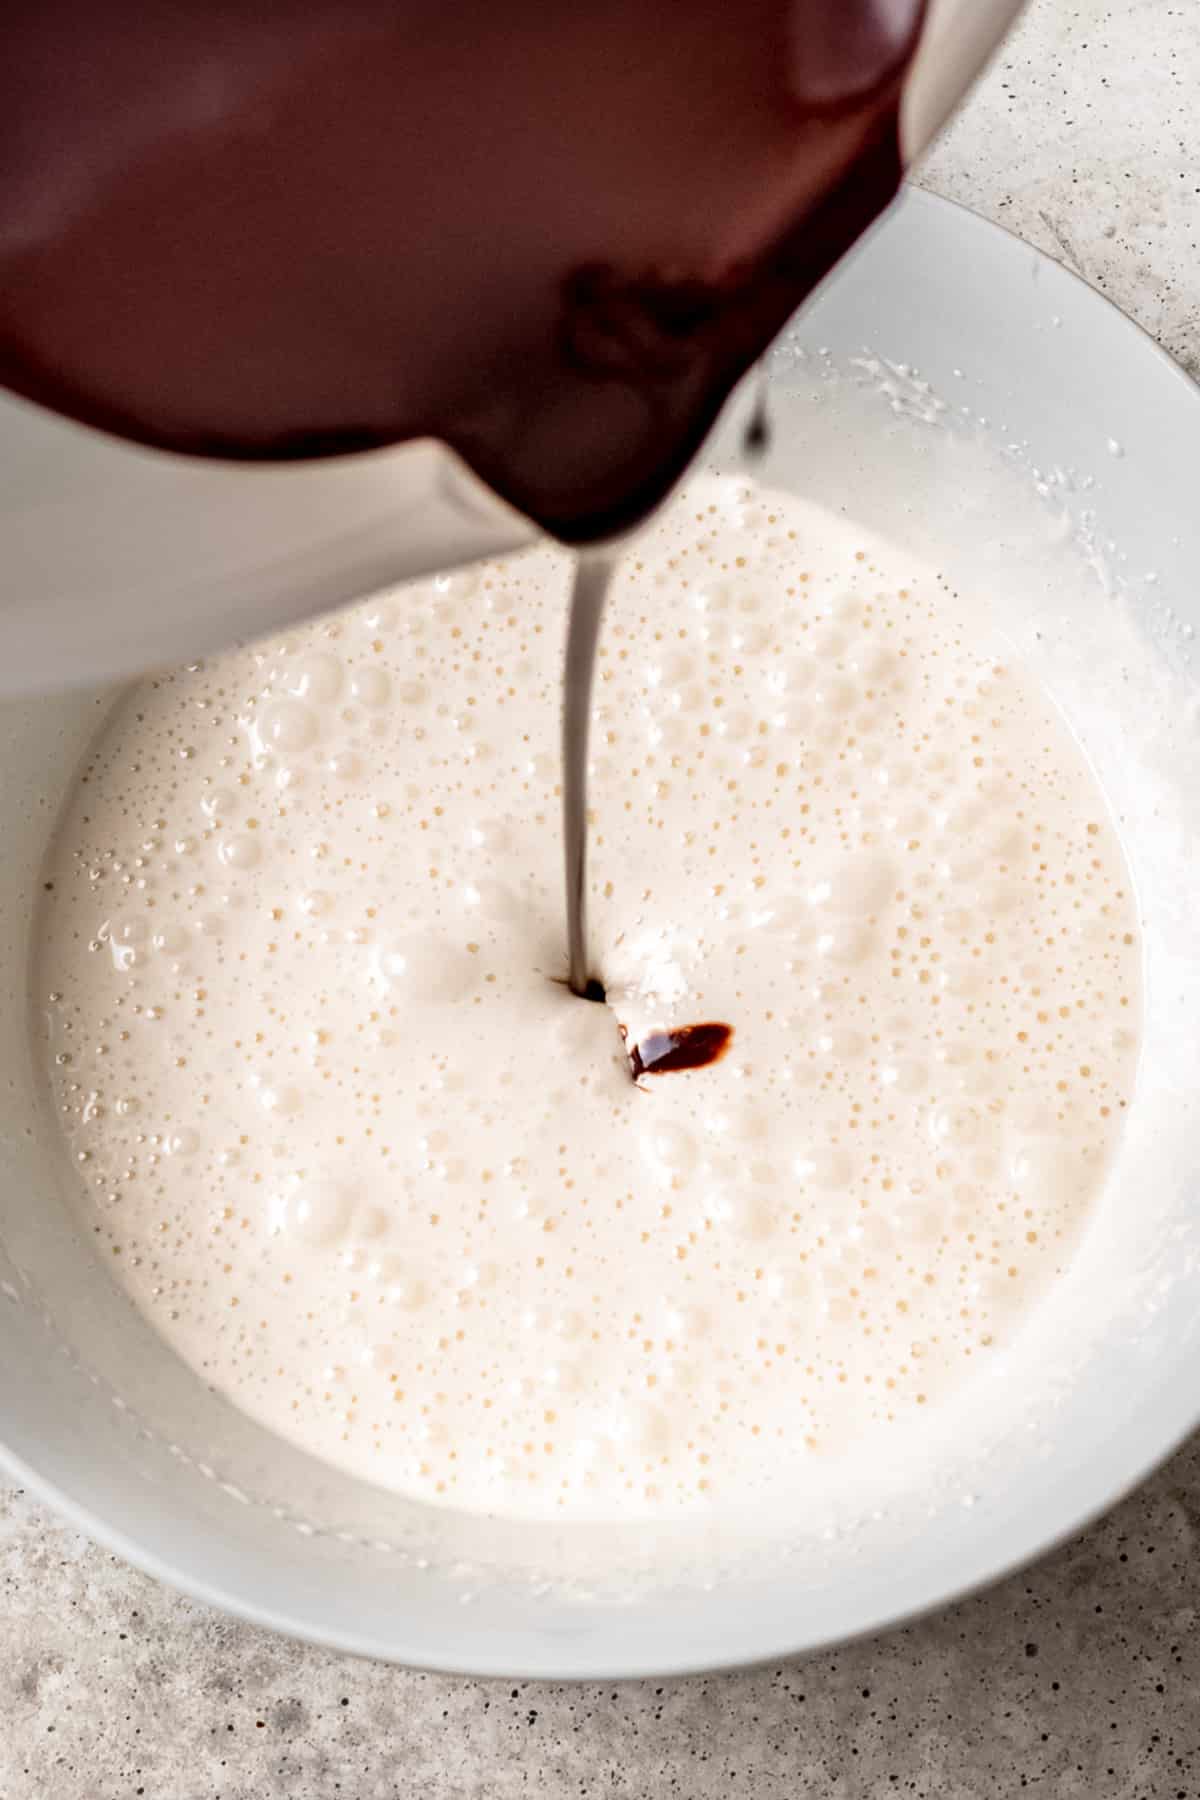
- Combine Mixtures: Gently fold the melted chocolate mixture into the whisked eggs using a hand whisk.
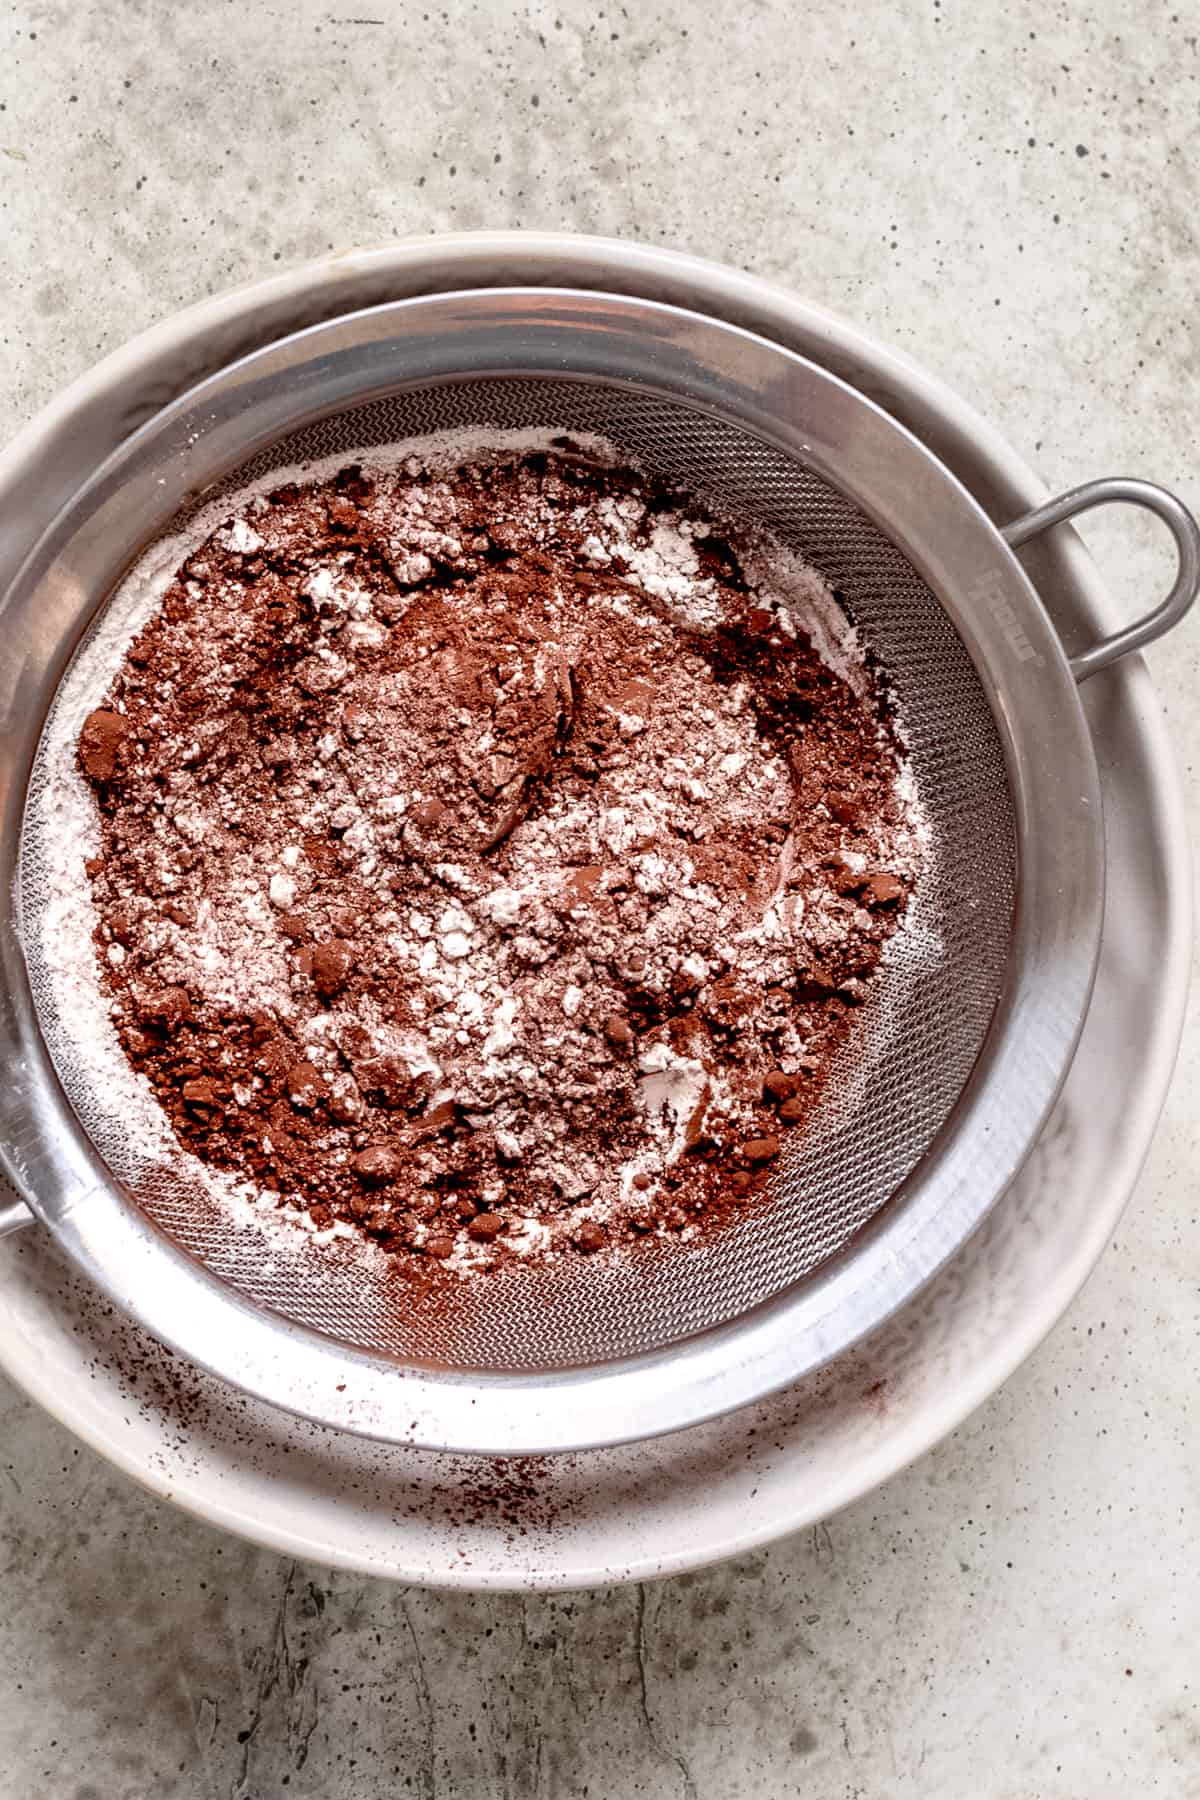
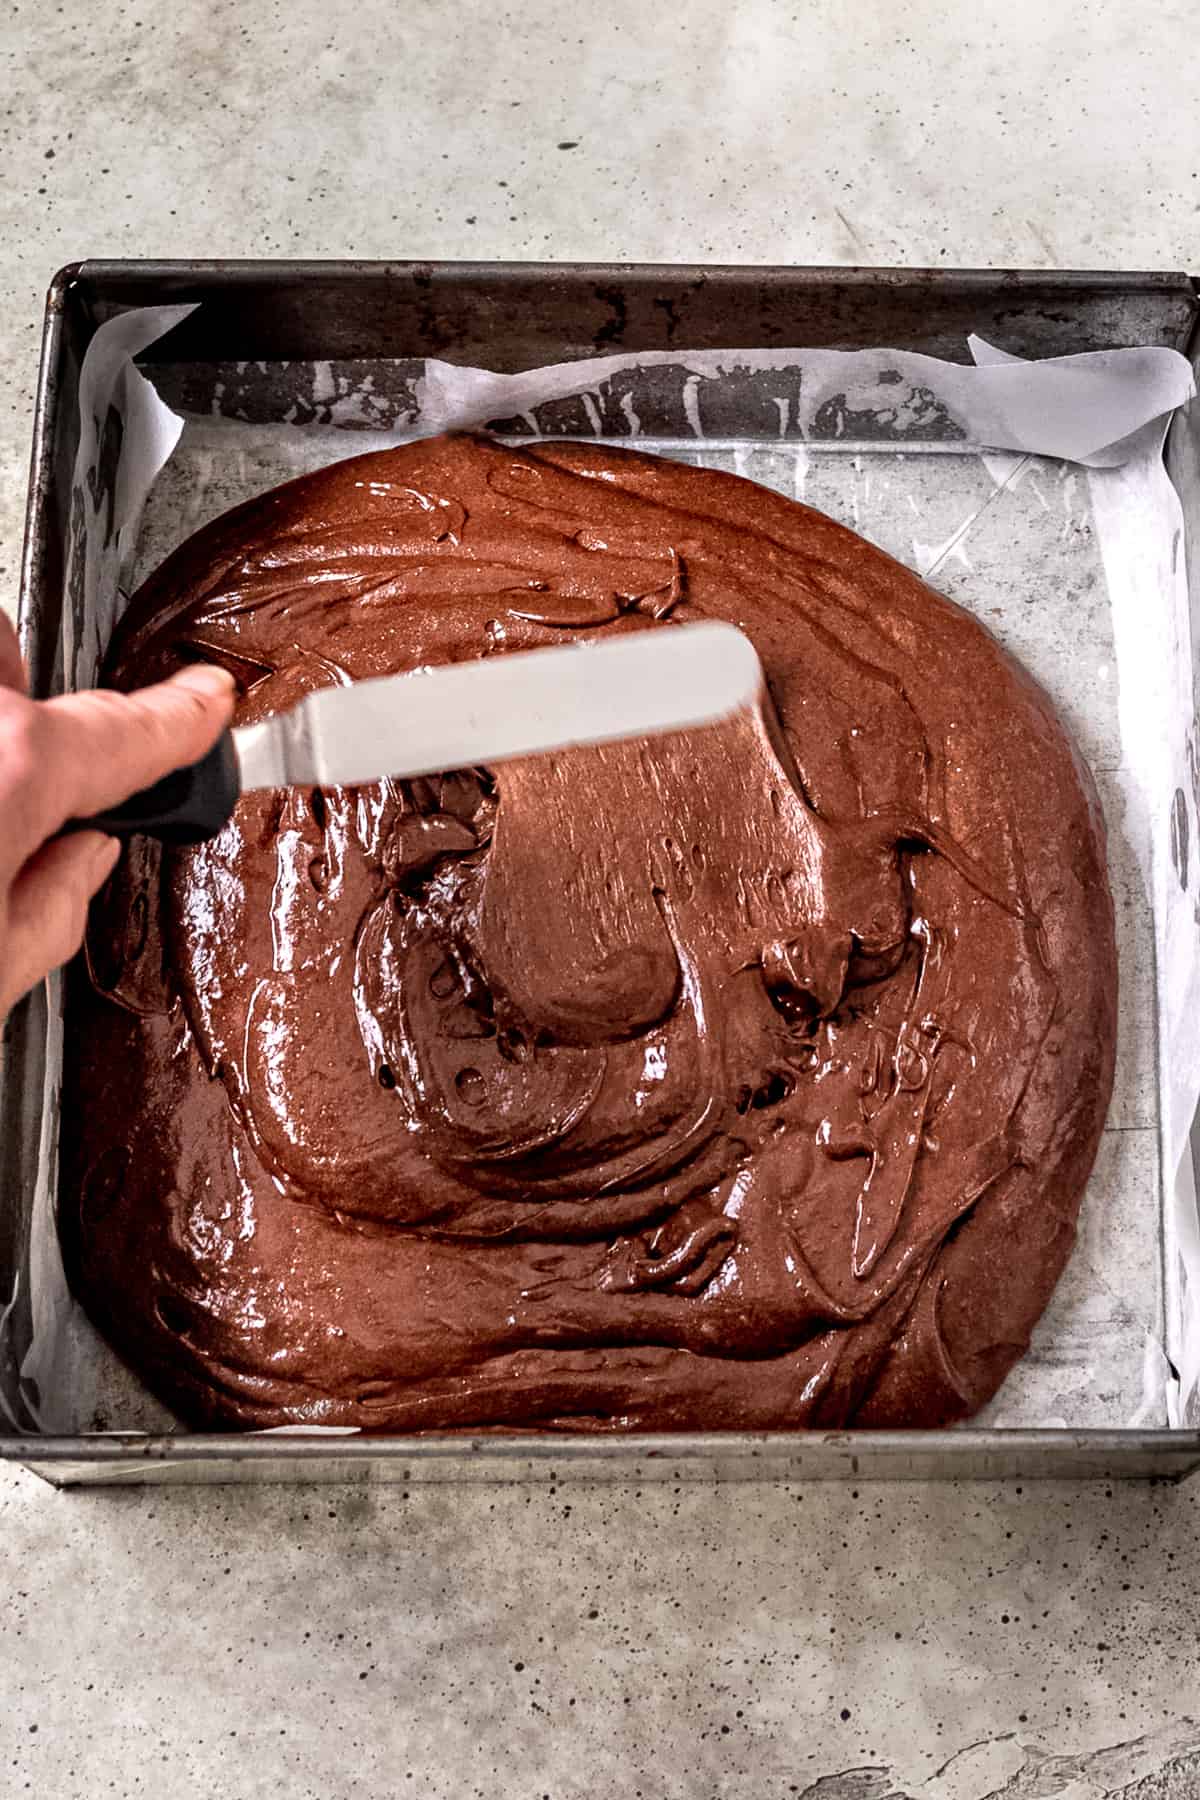
- Add Dry Ingredients: Sieve the cocoa powder and flour into the chocolate mixture and fold until combined. *Do not overmix.
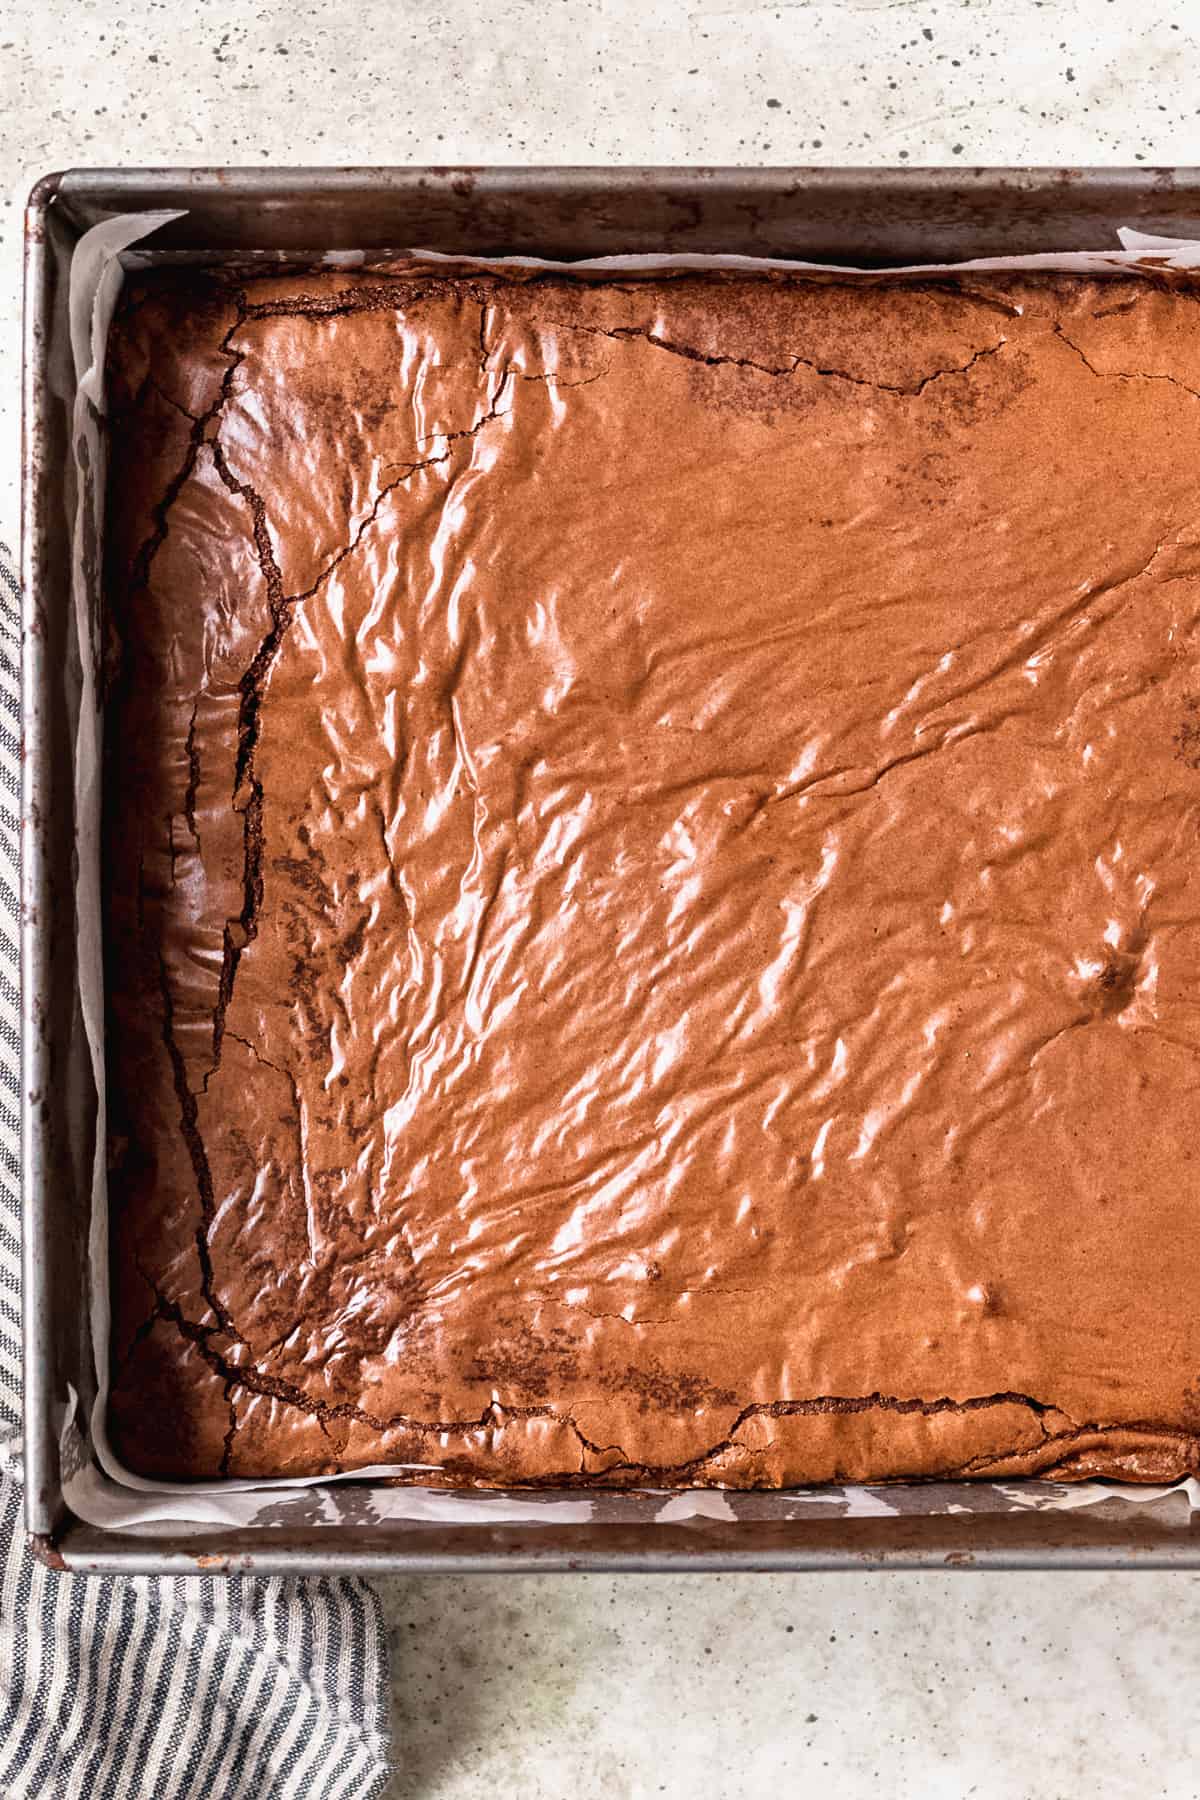
- Bake: Pour the batter into the prepared pan. Bake for 15 minutes, rotate the pan, and bake for another 10-15 minutes until the top is shiny and crackly.
- Cool and Slice: Let the brownies cool in the tin for at least 1 hour before slicing them into squares.
📖 Substitutions & Variations
- Add-ins– chocolate chips, semi-sweet, milk, or white chocolate chips, chopped walnuts or pecans
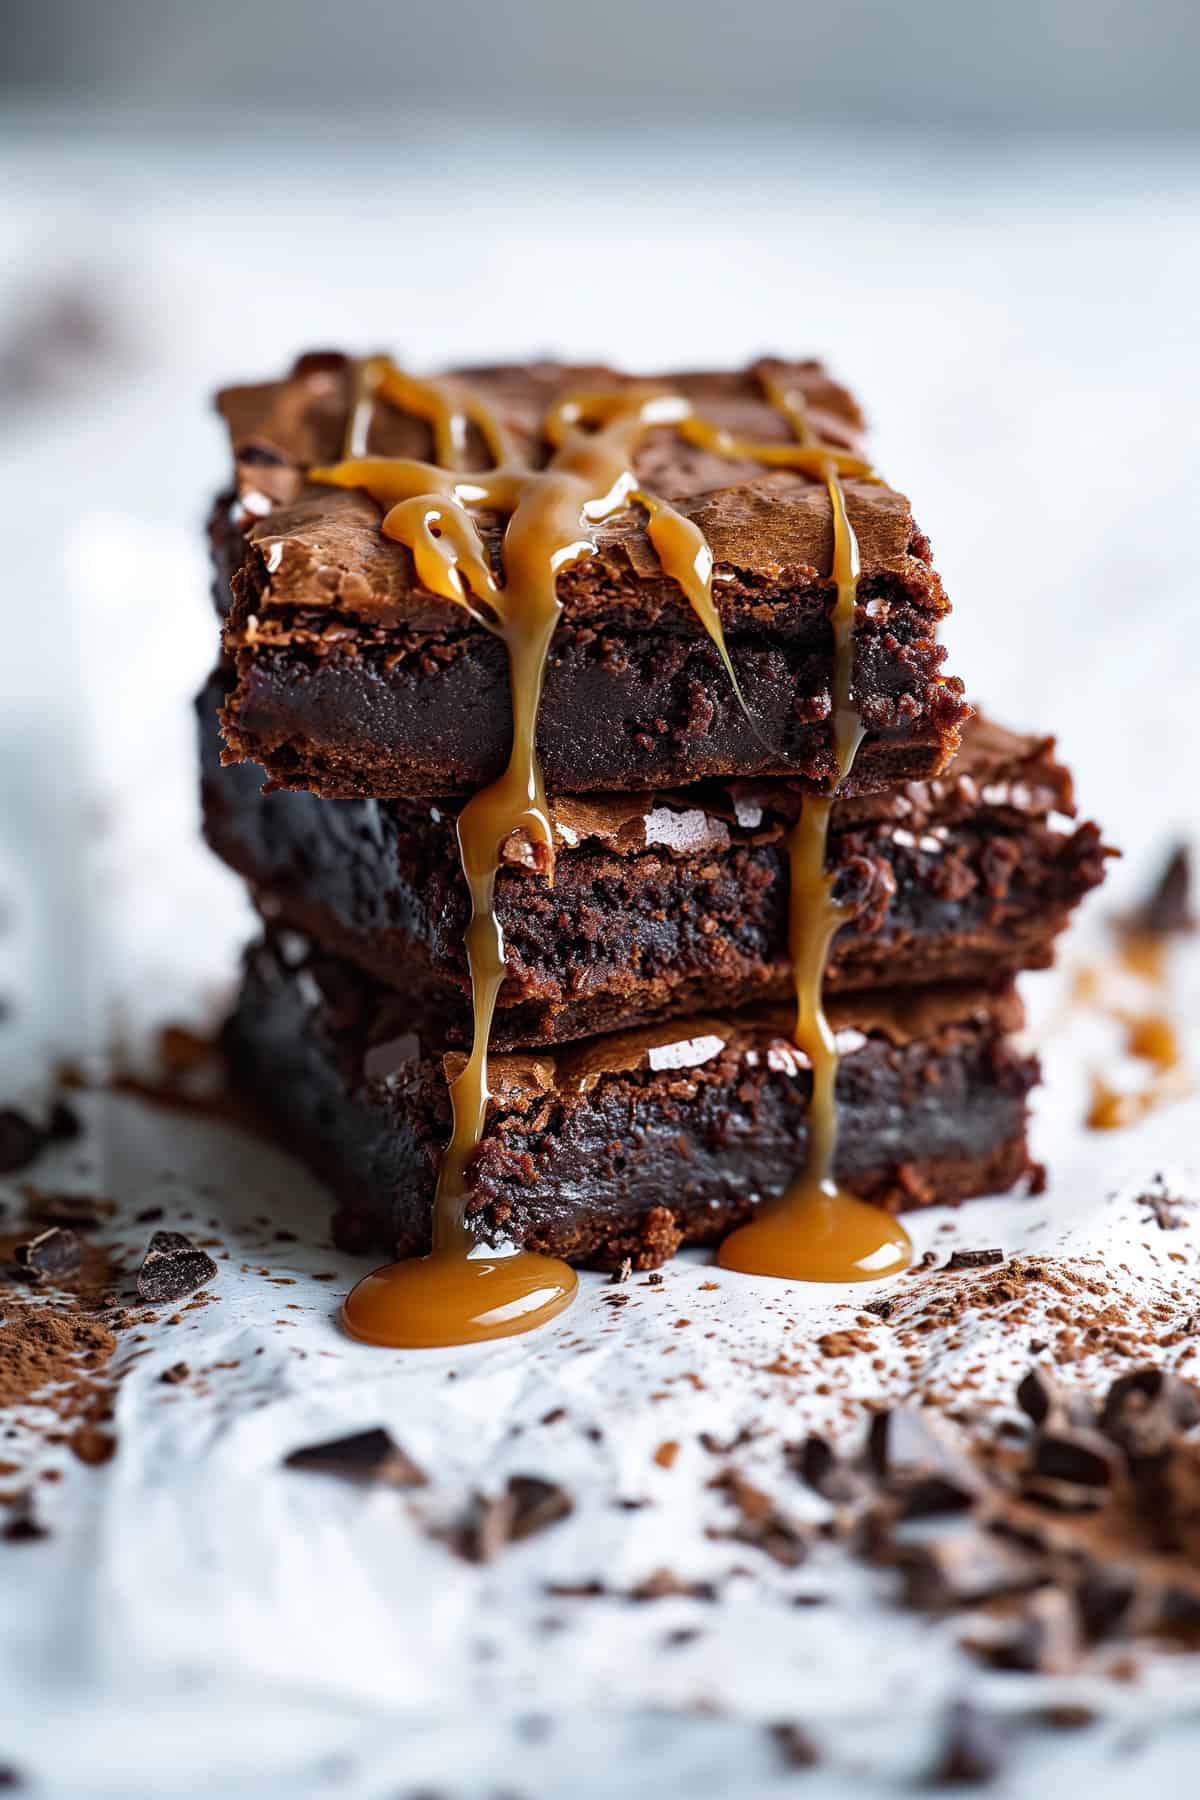
- Salted caramel– drop spoonfuls of caramel on the top of the brownies and use a toothpick or knife to swirl the caramel throughout the brownie batter before baking.
- Sea salt– for the topping. Sprinkle sea salt flakes over the brownies before baking.
💡 Chef’s Guide: Expert Tips
Drawing from a decade in Michelin-starred kitchens and Cordon Bleu training, here are my top tips for recipe success.
- Do Not Overmix: Fold the batter gently to avoid overmixing, which can result in dense brownies.
- Check Doneness: Start checking the brownies at the minimum baking time. A toothpick inserted should come out with a few moist crumbs, not wet batter.
- Cooling Time: Let the brownies cool completely in the pan to set properly before cutting.
🍯 Storing dark chocolate brownies
- Fridge: Store in an airtight container in the fridge for up to one week.
- Freezer: Wrap individual brownie squares in plastic wrap and place them in a freezer-safe bag or container. Freeze for up to 3 months.
- Reheat:
- Microwave: Reheat in the microwave for 10-15 seconds for a warm, gooey texture.
- Oven: Warm in a preheated oven at 300ºF (150ºC) for 5-10 minutes.
❓FAQ
Yes, but the brownies will be sweeter and less intense in flavor.
Fudgy brownies have a higher fat-to-flour ratio, while cakey brownies have more flour and rely on baking powder for a lighter texture.
Absolutely! Fold in ½ to 1 cup of chocolate chips before baking.
Make sure the sugar is fully dissolved in the egg mixture and the chocolate is smoothly melted.
Yes, but adjust the baking time accordingly. A larger pan will result in thinner brownies and may bake faster, while a smaller pan will produce thicker brownies that may need a longer baking time.
Did you make this dark chocolate brownie recipe? Please leave a star rating below, and be sure to tag me when you share a photo on social media—I love seeing what you’re up to in the kitchen!
You can also follow along on Pinterest, Facebook, and Instagram!
You can also find weekly meal plans and budget recipes on our sister site Savvy Bites.

The Best Dark Chocolate Brownies
Ingredients
- 1 ¼ cup (218.75 g) dark chocolate chocolate
- 1 cup (189.17 g) butter, *salted or unsalted
- ½ cup (62.5 g) flour
- ⅓ cup (43 g) cocoa powder
- 3 (3) eggs, *room temperature
- 1 ¼ cup (200 g) sugar
- 1 teaspoon (1 teaspoon) sea salt, *optional- for sprinkling
Instructions
- Preheat the oven to 325ºF or 160ºC. (for fan oven 320ºF & 150ºC) and line a 9 x 9 square pan with some baking parchment or greaseproof paper.
Mixing the brownie batter
- Melt the butter and the chocolate together in a bowl set over a simmering pan of water or in the microwave on medium setting, in 30-second intervals. Be sure to stir between each interval.
- While the chocolate and butter are melting, place the eggs and sugar in the bowl of an electric mixer fitted with the whisk attachment. Whisk on high until fluffy and pale in color. You can use an electric hand whisk if you don't have a stand mixer.
- Once the chocolate and butter are melted and the eggs are whisked, gently pour the chocolate mixture into the eggs. Use a hand whisk to gently fold the two mixtures together.
Baking brownies and checking for doneness
- Once the chocolate is incorporated, sieve the cocoa powder and flour into the chocolate mixture and fold in until just combined. Pour the brownie batter into the prepared baking tin and bake in the preheated oven for about 15 minutes. Turn the pan around and bake for another 10-15 minutes. *Be careful to not overbake.
- Once the brownies are baked, the top will be shiny and crackly and will appear set. Remove the brownies from the oven and leave them to cool in the tin for at least 1 hour before slicing them into squares.
Notes
- To cut the brownies, use a hot dry knife and wipe it clean before each slice. That will ensure each brownie has clean edges.
- Store any leftover brownies in an airtight container for up to 3 days in the fridge or in the freezer for up to 3 months.
- Serve them warm with vanilla ice cream and chocolate sauce for an easy dessert.
Nutrition

Meet the Chef!
Hi, I’m Debs. Cordon Bleu trained chef and recipe developer. I help you get incredible dinners on the table fast with fool-proof recipes and step-by-step instructions along with tips and tricks that I’ve learned over a 10-year career in professional kitchens.

Hi Debs, is there any way to reduce sugar to the minimum yet achieving the shining & cracking top? It seems impossible when I use only 120g (max 130g) sugar for this recipe…. 😪
Thank you~~ 💕
Hi Jen. The whipping of the sugar and eggs is what creates the shiny topping. If you’re reducing the amount of sugar you may need to increase the time you whip the eggs. Reducing the sugar to 130g may be a little bit too low to agitate and bond the proteins properly. Maybe increase the sugar to 150g and increase the time you mix the eggs and sugar. I hope that helps. Let me know how it goes. 🙂
I am going to be making these today. Probably twice! There is nothing better than homemade brownies, and the box stuff just doesn’t cut it. I think I will do one batch plain and then try another back with caramel candies layered in. Fingers crossed that it works!
These brownies are killer! The recipe just calls for “butter”, I used salted butter, because I believe that is what belongs in brownies. I baked them about 3 minutes too long, and they were still fabulous! Splurge for high quality cocoa powder and dark chocolate. You will not be disappointed. Treat yourself with a little bourbon sidecar. Heaven.
What do you think about adding walnuts and caramel? I’m trying to find the perfect brownie recipe for my niece to send her for christmas! And yours by far looks like best YUM!!! And how would you recommend packaging these to be shipped??
Hey Jessica! Yes. Walnuts and caramel would be awesome in these brownies. You can also use pecans which are to die for. If you’re going to package them to be shipped I wrap mine in plastic wrap then some tissue paper to make it look nice. Send them in a box that has enough filling to make sure that the brownies don’t get tossed around in the box. They should be good to go. I’ve shipped these brownies all over the world and that’s the exact method that I use and it has always worked perfectly. Enjoy!
Are you able to substitute gluten free flour?
Hi Dianna! Absolutely you can. Just do a straight substitution. No modifications are required. 🙂
So I’ve made these brownies twice and they were burnt twice…! I guess the oven temperature is wrong. First time, they burnt in 8’ at 150*C. Burnt. Like a thick black crust on top. I could try them with a spoon inside and that seemed like a great brownie (if cooked properly). I tried again today with a 120*C oven and this time, they only burnt in 7’…. I’m in France, I don’t know if the ovens are different in the US but there’s definitely something very wrong with the cooking instructions. A hundred degrees Celsius cooking is VERY hot. It’s pizza hot oven… are you sure that’s correct ? I guess, after this experience I’ll try a 80*C and just sit in front of the oven to check it all along. I’d love to try the recipe correctly because these look absolutely fantastic but honestly I’m tired of ruining ingredients over nothing… it’s just wasted.
Hi Pauline,
I’d love to help you troubleshoot this recipe and what’s going wrong. I’m UK based so also bake in Celsius. I know that the recipe is solid as I bake it about 4 times a week for the bakery I work in and follow the exact instructions as I’ve written them. Not sure what’s going on. Do you have an oven thermometer to check the temperature of your oven? Is it a gas oven or an electric convection oven? 100 celsius is actually a very low temperature. A pizza oven would be about 200-220 Celsius. So it sounds like the temps of your oven may not be matching up with the temps that the recipe is written in. It wouldn’t be possible to burn this recipe in 8 minutes in a 150 oven. It simply wouldn’t be hot enough.
If you could let me know 1. What kind of oven you’re using 2. what size tin you’re using and if you are substituting any of the ingredients. This is really puzzling to me, but I really would like to help get this right for you as it is a really really awesome brownie recipe.
Hi Debs, thank you for your reply. This is very helpful ! So the Celsius conversion should not be the problem. That’s out. As for the technology, I have a rotative heat gaz oven by Indesit. It’s always been quite powerful but not to the point of burning food (until now). Maybe the oven is losing it ! . I didn’t sub anything: I followed your instructions wisely 🙂 You’re the cook ! I’m just trying to make chewy brownies ! I’ll try again with a very low temperature indicator and maybe check the actual heat of the oven : I’m suspecting a malfunction in the heat notification at this point…
Hi Pauline, Just had a quick Google for your oven. Then had a thought. Is it at all possible that when you set the temperature it could have somehow turned on your grill at the same time? That would definitely explain the burning the top so quickly. Before you try the recipe again, it may be worth getting an oven thermometer from Amazon (about 10 eur), just to make sure that the temp is accurate. I’d hate for you to keep trying the recipe and not having the result that you want. It’s so frustrating. Keep me posted I’d love to have you make this recipe and love it as much as everyone else. Everyone deserves an amazing brownie!
Hi there, the pictures look fabulous! Just want to check if your metric conversion for the butter is accurate cos half cup + 1/3 cup butter is not 245g, is it?
It’s 190g of butter. Just took a look and realized that when you hit the metric conversion, it still includes the 1/3 cup of butter, plus the weight for 1/2 cup. Sorry about that.
If you just weight out 190g of butter, that will be perfect. Thanks so much for pointing that out.
Enjoy the brownies!
Debs! These were amazing ! The best brownie recipe I’ve ever made !
Thanks so much Lovely! Soooo happy you love them!
The Nicest brownies I’ve ever made in my life! sensational really! ?
Ah!!! You’ve made my day with this comment! So glad you love this recipe. Hopefully, it becomes your new go-to brownie recipe! Thanks so much for taking the time to comment. It means the world to me!
Hello, thank you for sharing this beautiful recipe. Just want to check if you’re using a fan over or a conventional one. Sorry if you’ve already mentioned this information elsewhere.
Hi Catherine. This recipe was done in a fan oven. If you’ve got a conventional oven then you can up the temperature by about 10-15 degrees and leave the brownies in for an extra couple of minutes. Hope you love these!
I made these but the amount of time doesnt seem like enough. The inside was so gooey we had to eat it with forks. The top got hard and shiney but didnt crack. Tastes really good, but I’ll have to try to cook them longer next time. Also I dont see anywhere on the recipe where you put the salt.
Hi Amanda. These brownies are meant to be quite gooey, although not quite so gooey that you need to use forks. If you want to cook them longer, then, by all means, add another 5-10 minutes on the cooking time, or, you can pop them in the fridge for about an hour once they’ve cooled. In the fridge, the chocolate sets up and the brownies stay really fudgey, although not overly gooey. And the salt gets added to the flour and cocoa powder. Sorry I missed that. Most brownies are also very lovely with a sprinkle of sea salt over top, right before baking. Enjoy!
They needed more time because you could still kind of taste raw sugar. I added a little salt but I used salted butter , it’s what I had, so i wasnt worried. But I will definitely make this recipe again but cook it longer. Because what we did eat was very tasty 🙂
The BEST brownies I’ve ever tasted. However, they are a little dense, do you know how can I make them a little lighter?
Hey Nicolle! So glad you love these brownies! If you want a brownie that is a little lighter, try reducing the butter to 1/2 cup, and add a teaspoon of baking powder to give it some lift and should make them lighter. Let me know what you think of the lighter version!
This is truly helpful, thanks.
FYI, a Bain-Marie is a warm water bath such as is used when baking custards in ramekins. The word, Bain, literally means Bath. What you refer to here is a double boiler. Easy way to remember : over simmering water is a double boiler. In simmering water (bath) is a Bain-Marie.
Hey James. Thanks so much for taking the time to comment. You may be new to the blog (if you are, welcome!) so you may have missed my bio. I’m a Cordon Bleu grad with 10 years under my belt in Michelin star kitchens. And those places don’t scrimp on French terminology, so I’m pretty up to speed on what a bain-marie is.
A quick Google would have informed you that a bain-marie is a process of cooking whereby the temperature of anything is either increased or maintained using water and steam.
So, yes you are correct in that a bain-marie is used for placing custards and pots de creme and cheesecakes and what have you in a pan immersed (although not submerged) in water.
However, where you are mistaken is where you state that the process of melting the chocolate and butter together in a bowl over simmering water is not a bain-marie.
I can assure you it is exactly a bain-marie.
What you speak of “a double boiler” is, in fact, the type of pan that you would use for this process.
A double boiler is a piece of equipment, not a cooking process.
My goal for Salted Mint is to empower people in the kitchen and encourage people to use techniques and styles of cooking that they may not be familiar with while having me walk them through it step by step.
But there is a lot of misinformation out there regarding techniques and equipment, as you have so kindly highlighted.
Thank you for bringing it to my attention. I thought about creating an index of culinary terms and definitions but thought that it wouldn’t be necessary with Google so readily at our disposal. My mistake. I’ll start working on this resource in the coming weeks.
Until then if you have any other questions regarding cooking terminology or techniques feel free to drop another comment or send me an email. I’m always happy to help.
Great information being shared here, thank you! My batch of brownies just came out of my oven a few minutes ago and they look amazing. I’m a new fan of yours and look forward to many more great bakes. And here’s what I learned today: (and congrats, you both are correct): bain-marie (plural bains-marie) In cooking, a large pan containing hot water, into which other smaller pans are set in order to cook food slowly, or to keep food warm.
Synonym: double boiler
Thanks so much David. It’s so lovely to have you here. Thrilled that you’re loving the brownie recipe. It’s on a non-stop rotation in our house! Enjoy them!
Thank you Deb! After I let them set for a while they turned out a little more solid which is perfect. I love this recipe thank you 🙂
Gorgeous recipe. I made them just now! The corners are beautiful but the Middle is very very gooey, to the point it doesn’t keep shape.. any tips?
Hey Tanya! So glad you love this recipe. I’d pop the tray in the fridge for 30 minutes to let it set up. The feedback I’ve gotten is that most people like these brownies warm, so I’ve added an extra 10 minutes cooking time so that when they’re still warm they’ll keep the shape, as well as have that divine crispy edge and crackly top. If you pop them in the fridge and let them set up they go almost like a chocolate fudge pate! Perfect for hot summer days! Hope that helps.
I’m making this for a party I was invited too. I have my “go to” brownie recipe but yours look so irresistibly fudgy! And I love the last shot – it looks like snow!
These look insanely delicious! I love a good brownie (corner piece, please!) and I like to underbake mine just a bit so they’re still soft on the insides. Love the tips here – I don’t tend to make my pieces of chocolate all the same size, but now I know that’s probably why it takes a while to melt for me.
This is the only way to make brownies — chewy and chocolatey. I can see how rich and moist they are. Forget about dry as crackers brownies. People have a tendency to overcook brownies. That’s not the way they should be. Yours are perfect. Great tips.
Dense? Check. Chewy? Check. Chocolate-y? Check. That meets all my requirements. They probably are the best! 😉
Those do look delicious! And the top is beautiful. Thanks for the tips and trickcs – I ofen find myself wondering just how someone got a certain result!
These looks so delicious,gooey and perfect!The pictures are making me have some today!
I will never say no to a brownie! These look so divine, and thanks for the step by step instructions, I’ll be giving these a go!
brownie is an absolutely fav of ours..we usually take shortcut with boxed one now you are tempting me to give homemade version a try.
I love scratch made brownies. When I was a child, my mother always made brownies from scratch. I remember her standing over the stove melting the chocolate and butter together. I was in my late teens before I ever realized that there was such a thing as boxed brownies. My children, however, rarely get to eat the good, homemade, ones. These look delicious. I will have to make some for my family.
I’ve never seen brownies so moist and decadent. Definitely a saver for me.
These brownies look like the best ever! Seriously, I haven’t seen a better brownie that is both chewy, moist and delicious! I can’t wait to make your brownies to see that they are indeed the best ever!! I’m sure they are!
First….these look divine. Chewy and chocolate is the best combination. I LOVE the fact they are NOT frosted. This is ALWAYS the debate in our house. I prefer unfrosted….everyone else wants frosting. Since I make them…they have to eat them the way I like. These would not last long in our house at all (even without frosting) since they sound so good.
OMG. These look awesome! I guess as a former pastry chef, you know ALL the tricks. 🙂
Thanks Natasha! I’ve got ALL the tips and tricks of the trade!
These look absolutely perfect! I love that gooey, chocolatey centre.
Thanks so much!
Hi Debs,
This looks really lovely and can’t wait to try it out! I’d just like to ask a question before I make it, I’ve noticed on the ingredients that you have split the butter up into two parts. Why is that?
Sorry for my ignorance 🙂
Hi Tyrone. The only reason for splitting the butter up was because this recipes has been converted from metric to imperial. It didn’t quite measure enough to be a whole cup and the butter and rather than round it up, it was better to adjust to 2 different measurements. I know it’s not completely ideal, but this recipe is so beyond worth it. Hope you love these brownies!
Can we have the metric measurements please. It is far easier to measure chocolate by weight than by the cup!
Hi Janene. I’ve put the measurements here (rounded up to the nearest whole decimal) but the recipe card does have a conversion tab at the bottom of the measurements to convert between Imperial and metric. I’ll work on making that more prominent. Hope this helps.
220g dark chocolate, 245g butter, 65g flour, 45g cocoa powder, tsp sea salt, 3 eggs, 200g sugar.