How To Make Easy Homemade Thai Red Curry Paste
This post may contain affiliate links.
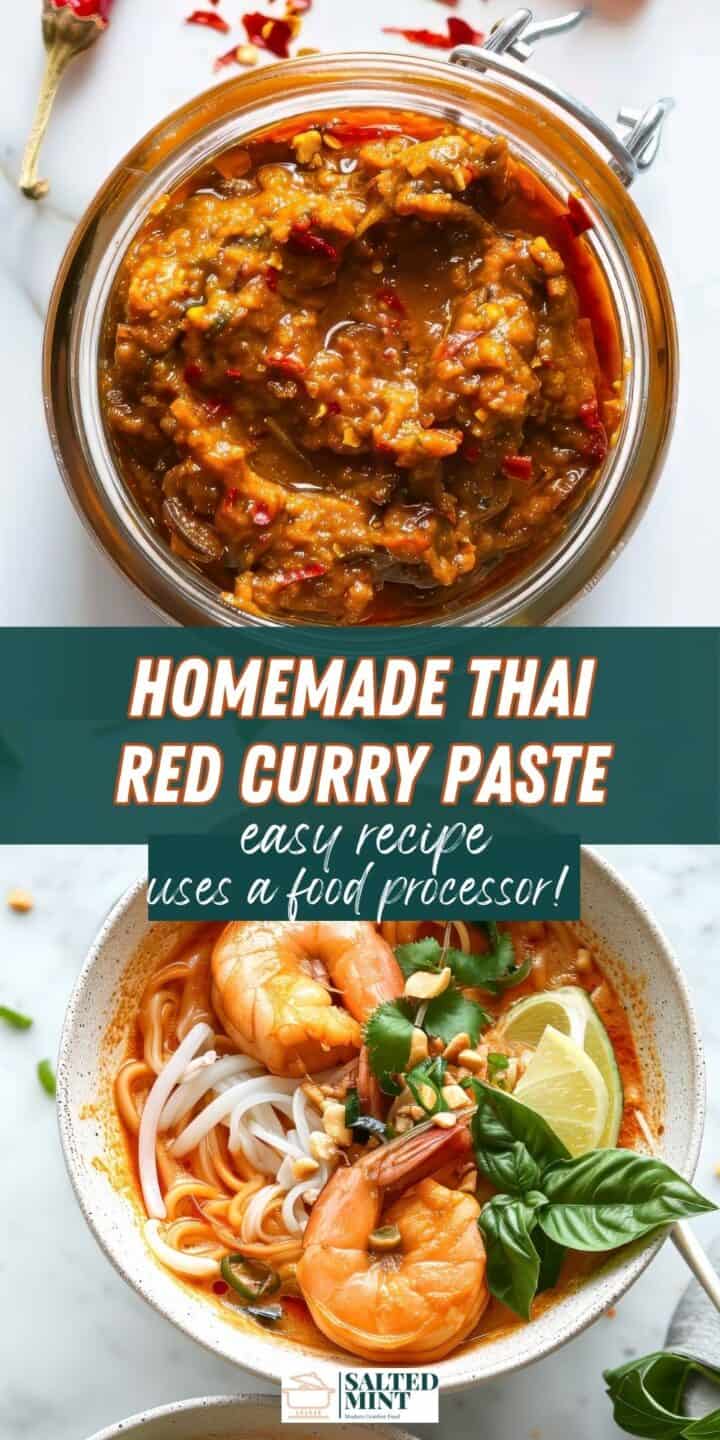
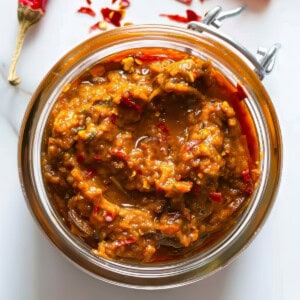
Make your own Thai red curry paste from scratch. This DIY curry paste, ready in 15 minutes, will result in the freshest flavors and ideal texture. Perfect for soups, noodles, and marinating proteins like chicken, beef, and tofu.
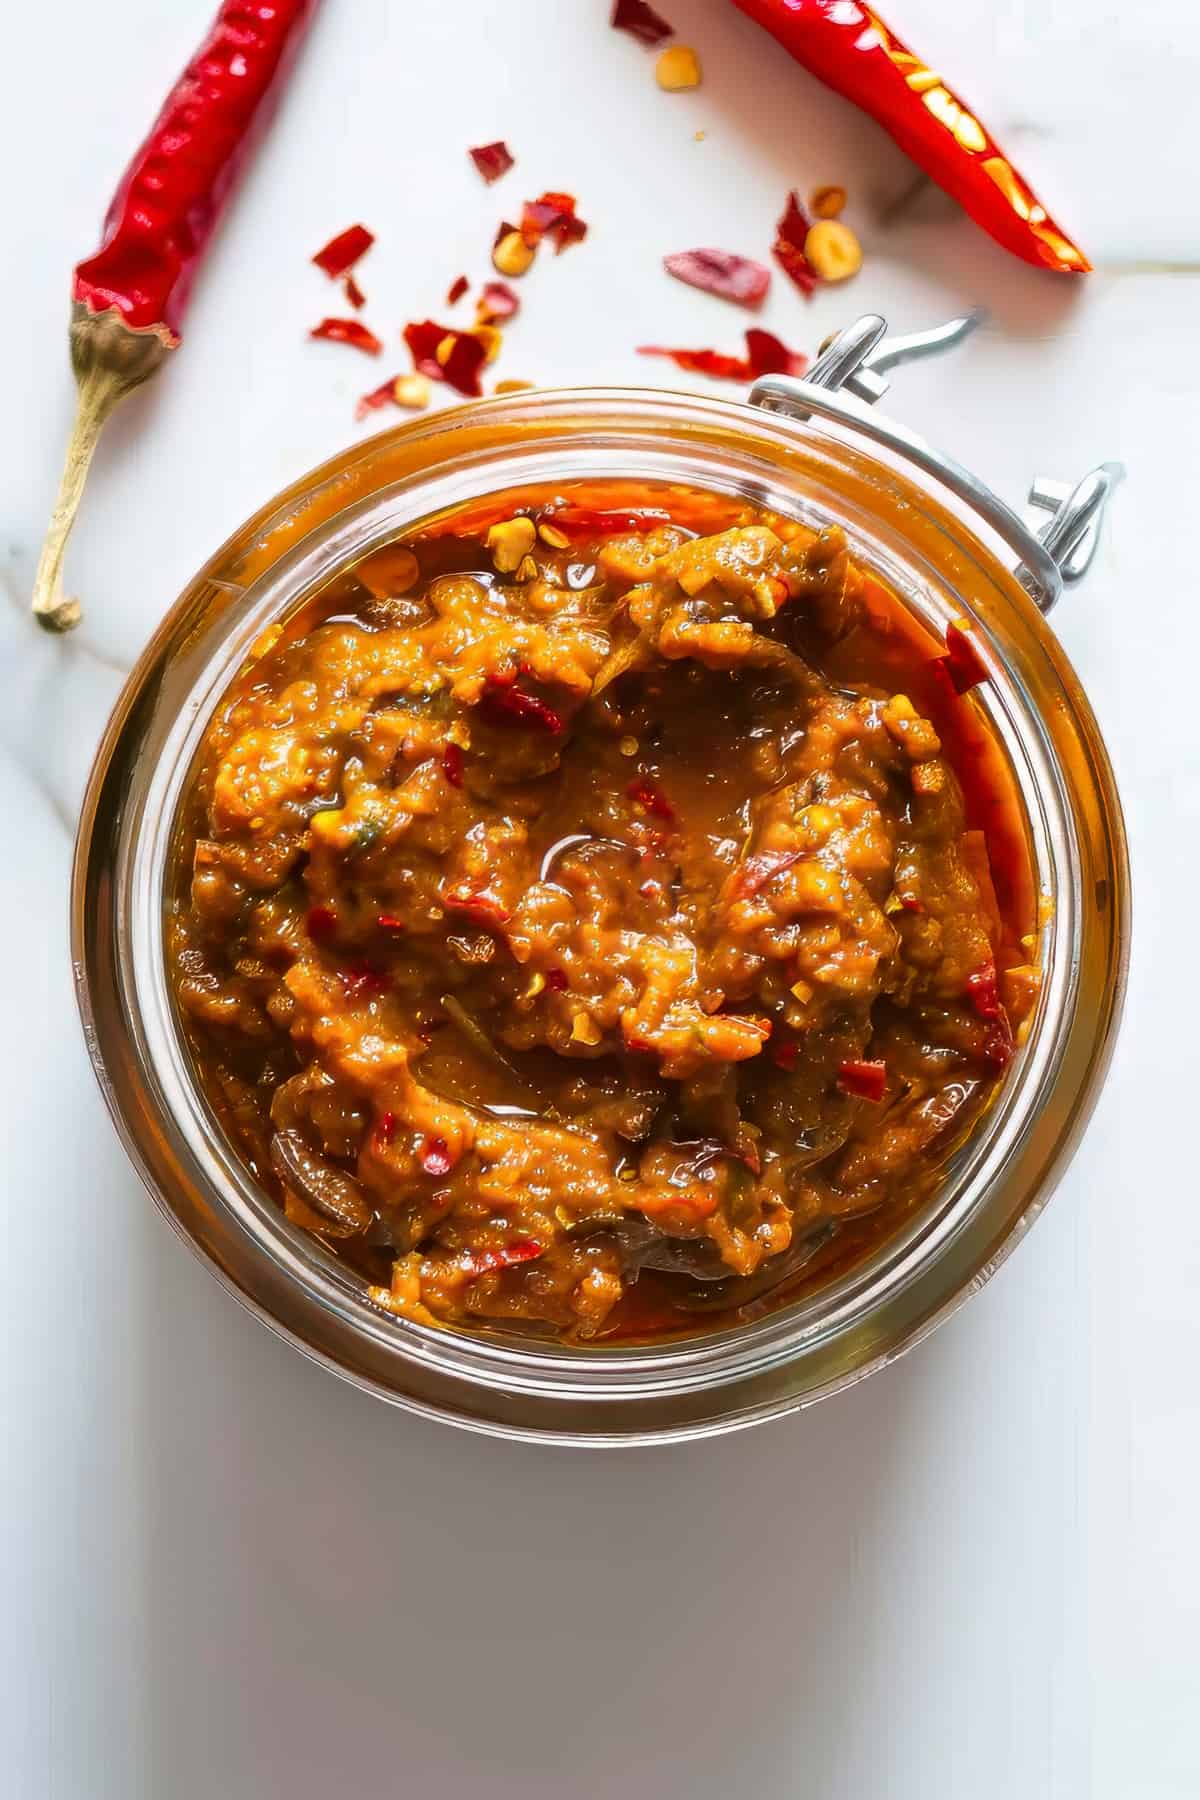
My Thai red curry paste recipe offers a unique twist by omitting shrimp, making it an accessible option for those avoiding shrimp or unable to find dried shrimp or shrimp paste. So, this is not strictly traditional but heavily inspired by authentic Thai curry paste.
I also have recipes for homemade Thai yellow curry paste and homemade Thai green curry paste. Use them to make my Thai yellow curry, vegetarian Thai green curry, or shrimp Thai red curry noodle bowls.
⭐️ Why this recipe works
- Time-saving: Utilizes a food processor instead of the traditional pestle and mortar, significantly reducing prep time.
- Accessible: Omits shrimp paste, making it suitable for vegetarians, vegans (with a soy sauce or tamari alternative to fish sauce), and those with seafood allergies.
- Authentic Flavors: Despite the modern method and ingredient substitutions, it maintains the rich, authentic flavors Thai cuisine is known for.
- Adjustable Heat: The recipe allows for easy adjustment of spice levels to cater to individual taste preferences.
- Long Shelf Life: This can be stored in the fridge or freezer, ensuring you always have homemade curry paste on hand for a quick and flavorful meal.
- Dietary Friendly: Offers fish sauce, soy sauce, or tamari options to accommodate various dietary restrictions and preferences.
🧾 Ingredients overview
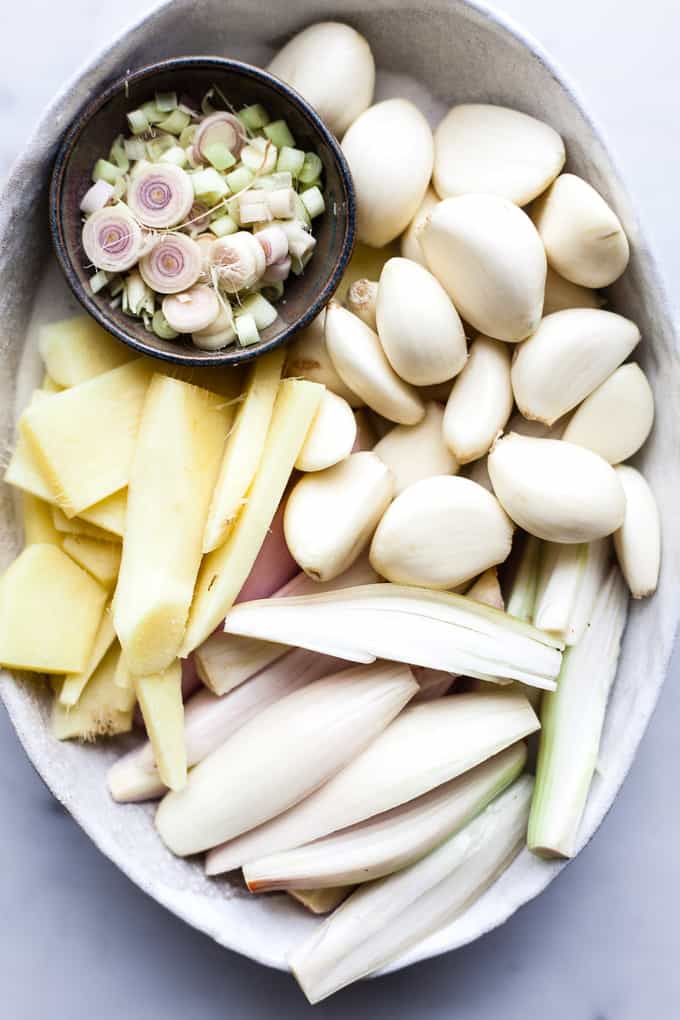
- Garlic, Lemongrass, Shallots, and Ginger: These aromatic ingredients form the base of the paste, offering depth and warmth.
- Dried Red Chilies and Red Serrano Pepper: These provide the signature heat, which can be adjusted according to taste.
- Cumin Seeds and Coriander Seeds: These spices add earthiness and a hint of citrus.
- Chili Powder: Adds color and an extra kick of spice.
- Fish Sauce, Soy Sauce, or Tamari: These options ensure the paste is accessible to all dietary preferences, adding necessary saltiness.
- Palm Sugar: Balances the heat with sweetness.
- Tomato Paste: Offers richness and a slight tang.
- Kaffir Lime Leaves: Infuse the paste with a distinctly Thai citrus aroma.
- Water (if needed): To achieve the perfect consistency.
For precise measurements and additional ingredients, refer to the recipe card at the bottom of the page.
👩🏻🍳 Here’s how to make it
Homemade Thai red curry paste step-by-step
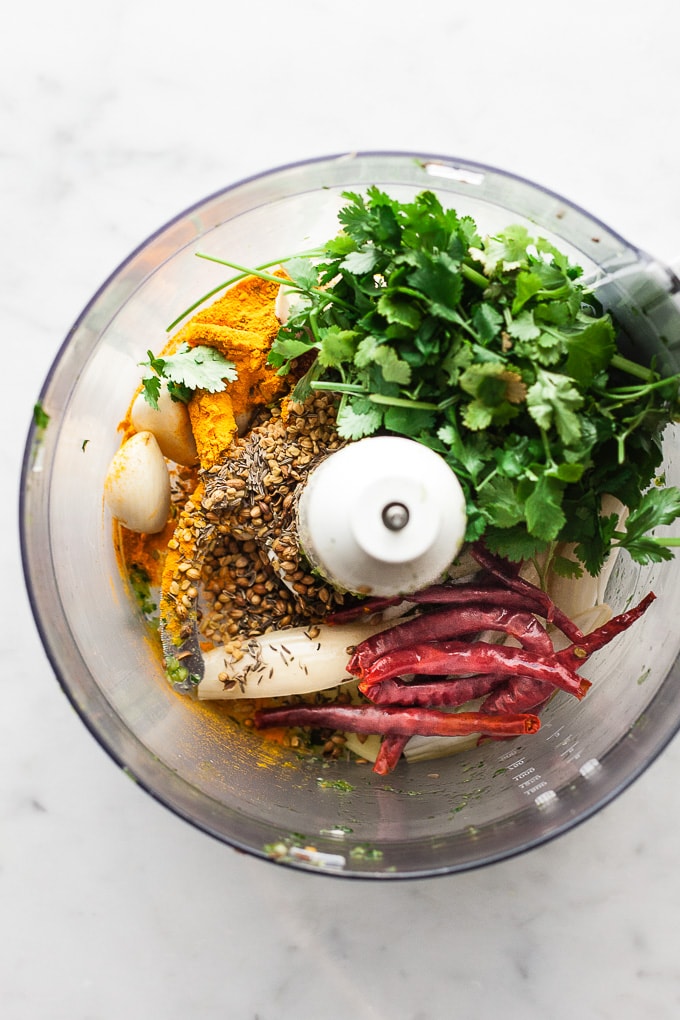
- Prepare your ingredients: Peel and roughly chop the garlic, lemongrass, shallots, and ginger. Soak the dried red chilies in warm water until soft, then drain.
- Into the bowl of a food processor, add all the prepared ingredients along with the red serrano pepper, cumin seeds, coriander seed, chili powder, your choice of fish sauce, soy sauce, or tamari, palm sugar, tomato paste, and kaffir lime leaves.
- Pulse until the mixture forms a chunky paste, adding water a tablespoon at a time if the mixture is too dry.
- Taste and adjust the seasoning, adding more chili for heat, sugar for sweetness, or fish sauce/soy sauce for saltiness, as desired.
💡 Chef’s Guide: Expert Tips
Drawing from a decade in Michelin-starred kitchens and Cordon Bleu training, here are my top tips for recipe success.
- Ingredient Prep: Finely chopping the ingredients before blending helps create a more uniform paste.
- Adjust the Heat: Start with fewer chilies and gradually add more to control the spice level.
- Freshness Matters: Use fresh lemongrass and ginger for the best flavor profile.
🍯 Storing curry paste
- Fridge: Store in an airtight container for up to 2 weeks. Drizzle a thin layer of oil on top to keep it fresh.
- Freezer: Freeze the paste in a ziplock or reusable silicone bag. Flatten the bag for easy storage and to simplify breaking off what you need for a recipe. It can last for up to 3 months.
- Reheat: Thaw frozen curry paste in the refrigerator overnight or briefly microwave if in a rush. There’s generally no need to reheat the paste before using it in cooking, as it will melt into your dish.
❓Thai Red Curry FAQ’s
I would highly recommend that you don’t use premade pastes in this recipe. They lack the freshness factor that brings a homemade paste to life. And the texture just isn’t the same.
How many chilies should I use if I like it really spicy?
In my experience, I would start at 8. You can always add more in, but once they’re in there, you can’t take them out!
It will keep perfectly fine in the fridge for a couple of days, but since this recipe makes a lot of paste, I would recommend that you freeze the rest. It will happily sit in the freezer for about a year. The spiciness will dissipate a little bit over time, but not enough to really make a big difference.
Absolutely! While a food processor makes the process quicker, you can use a mortar and pestle for a more traditional approach, which some say results in a paste with a better texture and more released flavors.
Yes, you can use brown sugar or even maple syrup as a substitute, though palm sugar offers a unique flavor profile closer to traditional recipes.
These are the tools that I’ve used and highly recommend.
Food Processor
Spatula
Reusable Freezer Bags
Make these Thai recipes with your homemade curry paste :
Did you make this recipe? Please leave a star rating below and be sure to tag me when you share a photo on social – I love seeing what you’re up to in the kitchen!
You can also follow along on Pinterest, Facebook, and Instagram!
You can also find weekly meal plans and budget recipes on our sister site Savvy Bites.
Easy Homemade Red Curry Paste
Ingredients
- 4 cloves of garlic, peeled
- 2 stalks of lemongrass, tough outer layers removed and sliced
- 2 shallots, peeled and roughly chopped
- 4- inch piece of ginger, peeled and roughly chopped
- 8 dried red chilies, soaked in warm water until softened and then drained
- 1 red serrano pepper, stem removed
- 1 teaspoon cumin seeds
- 1 teaspoon coriander seeds
- 2 teaspoons chili powder
- 2 tablespoons fish sauce, substitute with soy sauce for vegetarians or tamari for a gluten-free option
- 2 tablespoons palm sugar
- 2 tablespoons tomato paste
- 2 kaffir lime leaves, torn into pieces
- 2 tablespoons water, if needed to achieve the desired consistency
Instructions
- Prep Your Ingredients: Begin by preparing your ingredients to ensure a smooth blending process. Peel the garlic, shallots, and ginger, and roughly chop the shallots. Remove the tough outer layers from the lemongrass and chop roughly to make it easier to blend. Soak the dried red chilies in warm water until they soften, then drain them.
- Combine Ingredients in Food Processor: Place the prepared garlic, lemongrass, shallots, ginger, softened dried red chilies, red serrano pepper, cumin seeds, coriander seeds, chili powder, fish sauce (or its substitutes), palm sugar, tomato paste, and kaffir lime leaves into the bowl of a food processor.
- Blend to Desired Consistency: Pulse the ingredients in the food processor until they come together into a chunky paste. If the mixture is too thick and struggles to blend, add water, one tablespoon at a time, until the paste reaches your desired consistency.
- Storage: Transfer the paste into a ziplock or reusable silicone bag. Flatten the bag before sealing to spread the paste out, making it easier to break off the amount you need later. Freeze the paste for long-term storage.
Notes
- Soaking Chilies: Softening the dried chilies in warm water not only makes them easier to blend but also helps to release their full flavor. Ensure they are well-drained to prevent the paste from becoming too watery.
- Adjusting Heat: The heat level of this red curry paste can be easily adjusted by increasing or decreasing the number of chilies or the inclusion of the serrano pepper. Tailor it to your spice preference.
- Substitutions: For a vegetarian version, soy sauce is a suitable substitute for fish sauce. For those requiring a gluten-free option, tamari is an excellent alternative. Both substitutions keep the authentic Thai flavors intact.
- Lemongrass Tip: To maximize the flavor extraction from lemongrass, ensure you remove the tough outer layers and only use the softer, more fragrant part near the root.
- Kaffir Lime Leaves: These leaves add a distinct citrusy aroma that is quintessential to Thai curry pastes. If you cannot find fresh kaffir lime leaves, dried ones are an acceptable substitute, though fresh leaves are preferable for their vibrant flavor.
- Usage: This Thai red curry paste can be used in various dishes, from curries to soups, and even as a marinade for meats or vegetables. Its rich flavor improves with time, making it a versatile ingredient in your culinary repertoire.
- Freezing: Freezing the paste in a flat, thin layer allows you to break off just what you need for a recipe, reducing waste and ensuring you always have homemade curry paste on hand for a quick and flavorful meal.
Nutrition

Meet the Chef!
Hi, I’m Debs. Cordon Bleu trained chef and recipe developer. I help you get incredible dinners on the table fast with fool-proof recipes and step-by-step instructions along with tips and tricks that I’ve learned over a 10-year career in professional kitchens.